The Microsoft Office suite has plenty of fantastic features that let you create almost anything you want with your data. But what makes Office stand out from any of the other free tools in the marketplace is the ability to enhance its functionality using add-ins. In fact, there are plenty of add ins that even work for non-traditional desktop versions of Office (iPad).
That said, many of us never think of using them either because we don’t know how to do it or because we fear its too much trouble. If that’s the case, this guide will show you how easy it is to install Microsoft Office Add Ins and use them effectively in preparing any documentation.
Microsoft Office Add-ins are available for Microsoft Word, Excel, PowerPoint, Outlook, Project, and SharePoint. You can check out our previous post on some cool add-ins that we thought would help you in preparing your Word documents.
How to Install Microsoft Office Add Ins and Use Them
You can install Microsoft Office Add Ins in one of two ways. By heading to the Store from within an Office program or by visiting the Office Store online.
Let’s check out how to install the add ins from within Microsoft PowerPoint 2016. It should work much the same way in other office programs as well.
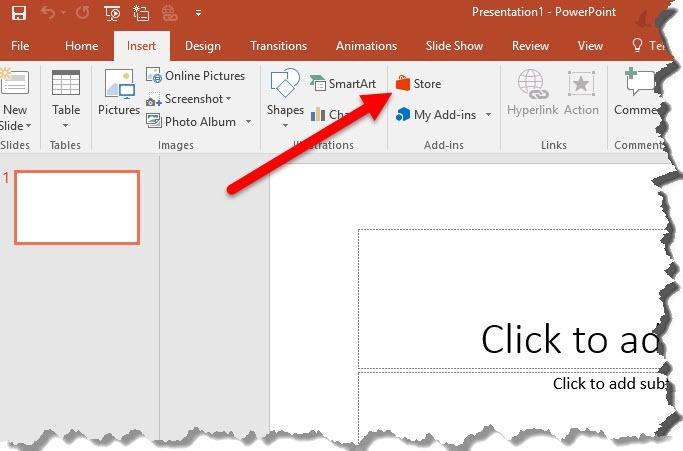
1. On the Insert tab, in the Add-ins group, click Store.
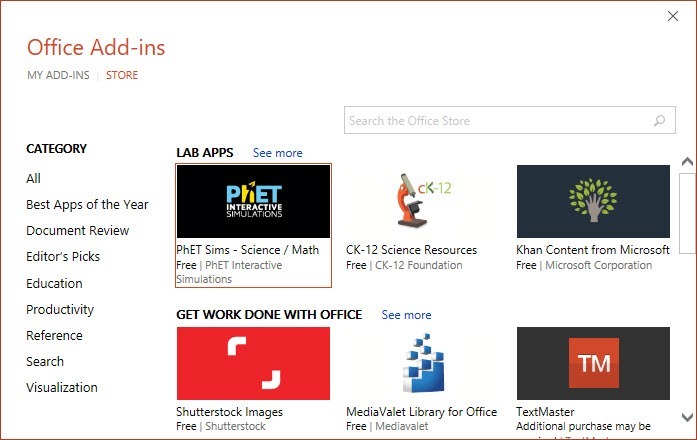
2. The Office Add Ins Store pane will pop up, allowing you to browse and search for add-ins.
3. Once you have decided on the add in you want to use, select the add-in.
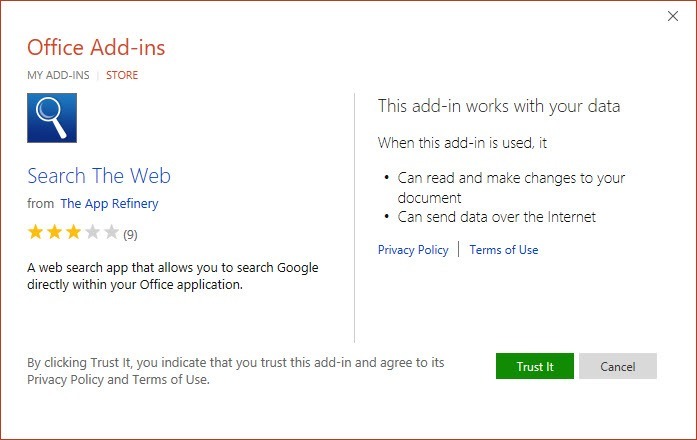
4. In the next screen, click Trust It to grant permissions to the add in to access your document.
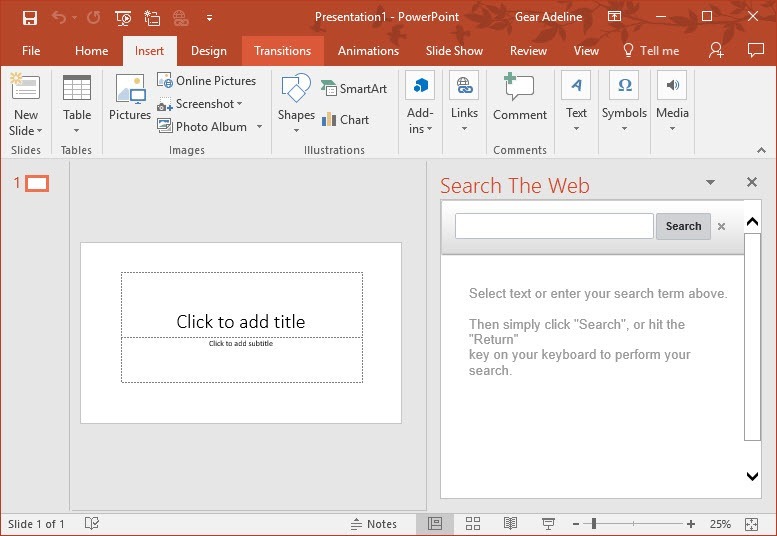
5. The Add In will now appear in a sidebar within your document. In this example, you can see the Search the Web add in displayed in a sidebar pane to the left of my presentation.
If you are downloading the add-in from the Office Store via the web, you have to first select the add in and then click the Add button. You must then sign in to your Microsoft account, if you haven’t already done so and click Continue to complete the download.
Then open the Office application you want to use the add-in with and select the Insert tab. In the Add-ins group, click My Add-ins. You should find the add-in available in the window. If you don’t see it, just hit the Refresh link at the top right corner of the window.
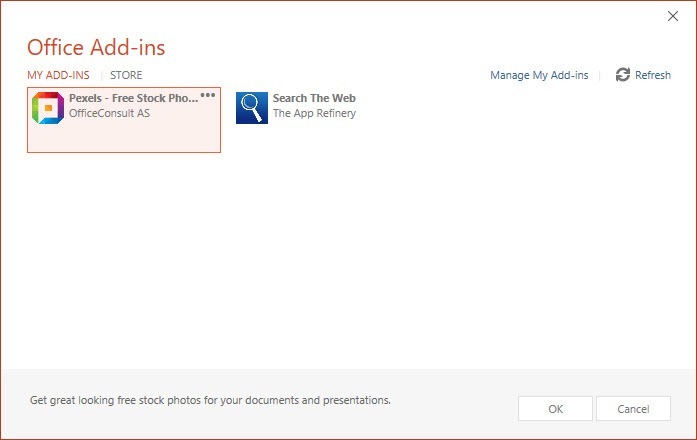
Select the add-in from the pop-up window and then click OK. It will automatically be loaded to your Office program.
How to Use Add Ins With Any Office Program
When you’re working with a document and you need to use an add-in, you can simply head to the My Add-ins window to select and start using it. Some add ins come with their own group of commands so you can click them on the Ribbon and start using them right away.
You can also remove it from the sidebar and use it as a floating window by dragging it out. To put it back in place just drag the floating window and move it towards the left of the document. It will reattach itself as a sidebar.

When you are done using the add-in, click the X button in the sidebar to close it.
If you want to load another add-in just select it from the My add-ins window as before. If you have room on your screen, you can also select to display multiple add ins simultaneously.
If you want to get rid of an add-in from your account, go to the My Add Ins window, hover over the … icon and click Remove.
That’s it!
Microsoft Office Add-ins are handy tools that make it easy for you to complete your task in an Office program without ever having to leave it. Now that you know where to find the tools to translate your test, find free images or search the web without leaving your program, make use of the tools and work smartly and more efficiently.
Leave a Reply