The iPhone’s Do Not Disturb feature is highly useful when you want to silence calls or messages during certain times of the day, such as when you are in a meeting. Previous versions of Android lacked the Do Not Disturb feature, but now Android 5.0 Lollipop lets you apply the Do Not disturb mode via its Interruptions settings. If you have just upgraded to an Android Lollipop device or upgraded your software, then this post will show you how to setup the Do Not Disturb mode.
How to Setup Do Not Disturb Mode in Android L
The Do Not Disturb mode in Android Lollipop is called Priority mode. You can access the Priority mode by pressing the volume button on your device. When you do so you will see a slider bar at the top displaying 3 options; None, Priority, and All.
- The None option ensures that you are not interrupted by anything, including your alarm.
- The Priority option lets you choose which calls and notifications you want to receive at specific days and times and;
- The All option allows all calls and notifications to come through, as it normally would.
To activate Priority mode, press the volume button and move the Slider to Priority. Next set the configuration options in the Interruptions settings.
1. Navigate to System Settings.
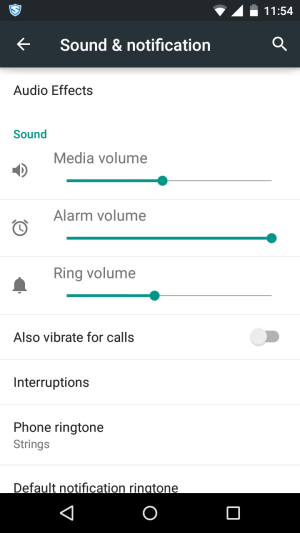
2. On the Settings screen, in the Device section, tap Sound & Notification.
3. In the Audio Effects screen, tap Interruptions.
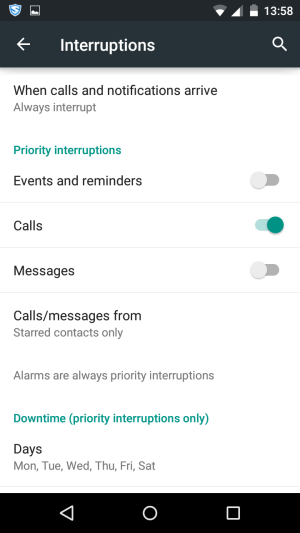
4. You have a number of options to select here.
- When calls and notifications arrive – Let this option remain the default one – Always interrupt.
- Priority interruptions – It is better to only allow calls from important contacts to come through. You can turn off Events and reminders as well as messages.
- Tap the Calls/messages from field and select Starred contacts only. This will ensure that you only get calls from contacts you have starred.
- Tap the Days field to select the days when you want the silent mode to be active. You can choose Monday to Friday or Monday to Saturday if you like.
- Tap on Start time and End time and configure your bed time and wake time or your meeting times according to your requirement.
That’s it! You have now configured Do Not Disturb Mode in Android Lollipop. You can of course tweak the settings to your own requirements after the initial setup to match what works best for you. For instance you can turn on Messages and then specify from whom you are ready to accept them (Anyone, Starred contacts or Contacts Only). You can then select the days and time period to allow sound notifications to pop up. The same thing goes for events and calendar items.
Remember to change the Priority Mode to All when you are done with your nap or meeting to start receiving your notifications and calls normally.


Leave a Reply