Want a simple, free screen capturing tool that does more than the default Windows Snipping tool? Check out Snipaste, the app that lets you take screenshots and paste them in floating windows with ease!
Snipaste is a free Windows app that can do one thing very well – capture screenshots of individual elements like the taskbar and menu items. You can download Snipaste from the official website and run the EXE file. If you see a DLL error, you’ll also need to download and install Visual C++ Redistributable for Visual Studio 2015 by clicking here.
Once installed you can access the app from the system tray. One of the first things you need to do before you start using the app is to get familiar with the settings. Right-click the icon on the system tray and select Preferences. This will open up the Snipaste Options window with a number of tabs. Run through the various options in the tab to get familiar with the snipping options and settings available to you. You can tweak them later to suit your needs.

The General tab lists options to choose your language, font, theme color and some additional options like setting it to run on system startup.
The Snip tab offers options to customize the app’s screen capture settings. You can select the mask color, which is the color of the region not in the screenshot. You can also enable or disable window and UI element detection. If you are using an external keyboard, you can set Snipaste to ignore the Win key on the left or right. You can also choose the number of items that will be archived in History and the folder where the screenshots will be saved.
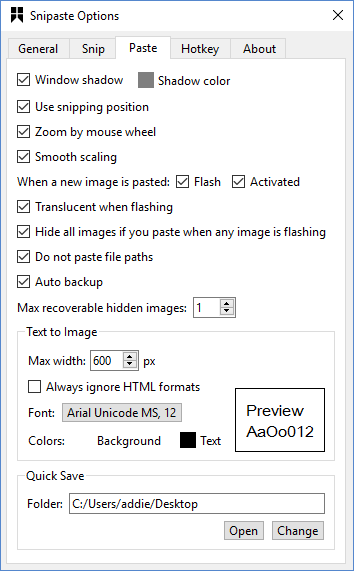
Next is the Paste tab that offers plenty of options for customizing. You can choose whether or not a screenshot should have a shadow, set a zoom in area if you require one, set the width, font, background and text color and preview it and more. You can also set how many images Snipaste can recover from your history. Take a look at the image below to view all available options.

Next is a very important tab – the Hotkey tab. This is where you can customize the hotkeys. By default F1 is the key to snip an image, F3 is to paste it, and F4 is to make images unclick-able. You can also modify the hotkeys to accommodate your working style.
To start snipping, open a window. Let’s use Windows Live Writer for this example. Hit the F1 key to activate Snipaste. Move your mouse pointer over the UI elements in Live Writer and notice how each element is individually highlighted and ready to capture. You can also capture the whole window or a portion of your screen.
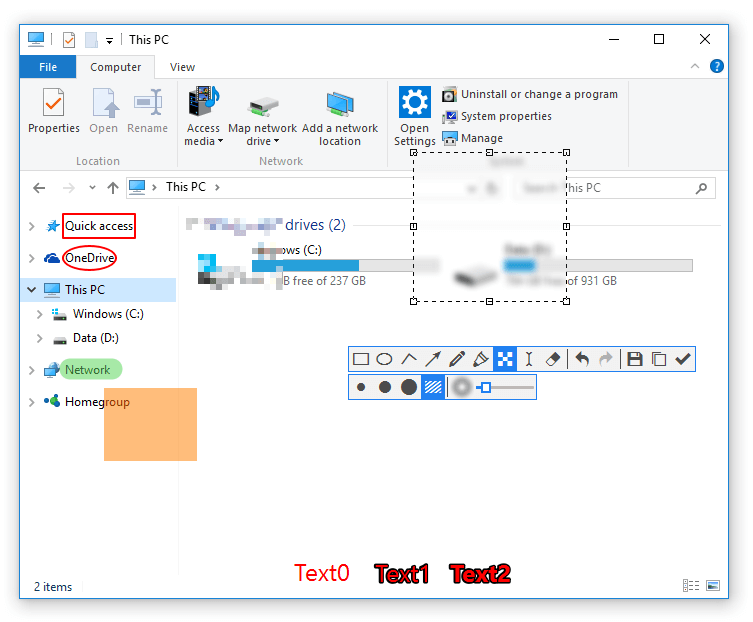
Once you’ve selected the capture region, you can do some more editing work on it using the options in the tiny dropdown below the capture. You can draw on it, write text, blur elements, erase stuff and more. Just hover over the various options to see what you can do. The option to save is also available in this toolbar. Click it to save it in the desired location.

Snipaste is currently available for Windows but is expected to become available for both masOS and Linux as well. If you like a little more functionality with your free screen capture tool in Windows, do give Snipaste a try!
Leave a Reply