The iPhone Home screen has a ton of apps that appear on the Home screen and most of the time they just sit around unused. You could simply delete them, but of course you won’t because who knows when they’ll come in handy? In such situations, its easier to simply create nested folders and put them away until you need them. In this post, we’ll show you how to do exactly that! This should also work if you have apps that you don’t want others prying into and yet easy for you to access.
Nested Folders are basically folders that can be dragged into another folder that you created. Nested folders will not appear on the home screen but is still easily accessible by opening the folder in which you created it. it also offers the added benefit of increasing the space on the Home screen. Although this feature is not available as a default function, you can still use his hack to get it done.
How to Create Nested Folders on Your iPhone
1. Identify apps that you want to place inside a folder.
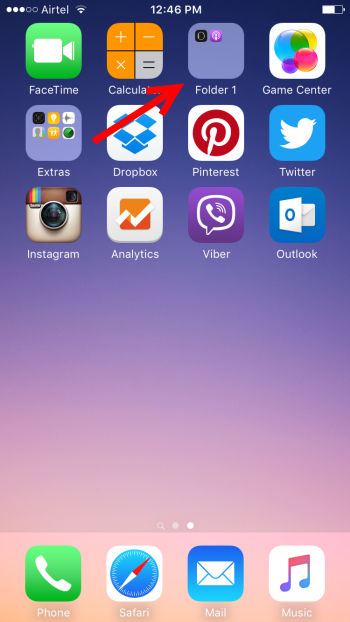
2. Drag one app over another to create a folder. You now have folder number 1.
3. Drag any other apps you wish to hide into folder 1.

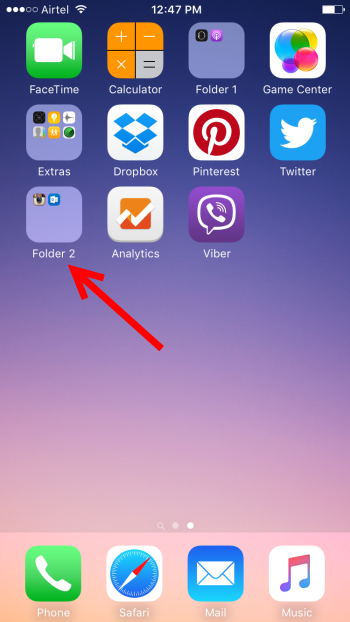
4. Create another folder with apps you want to display on your home screen. This will be folder 2.

5. Now comes the slightly tricky part. Hold folder 2 until the app icons begin to wiggle. Without leaving your hand on folder 2, (use your other hand) start tapping on folder 1. It is best that you have folder 1 at the top of the screen and tap in the space between the folder and the top banner where the time is.
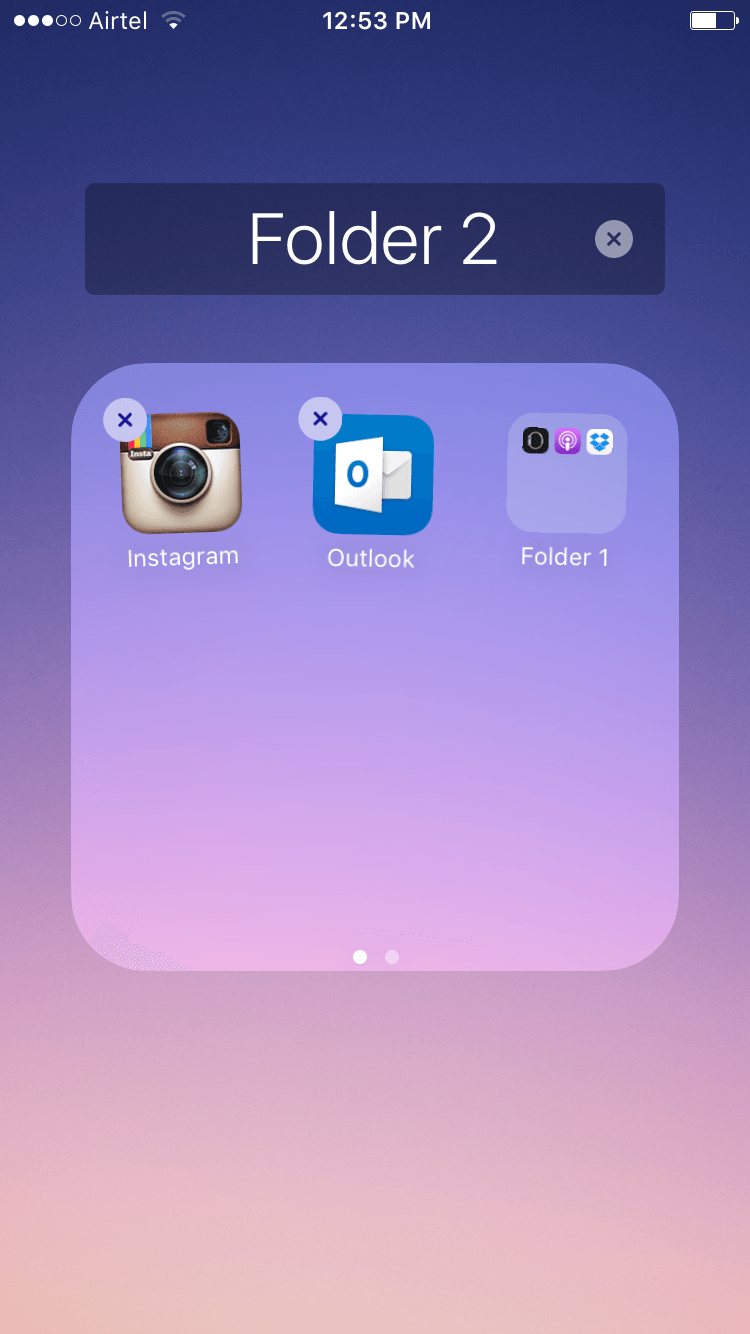
6. This will open up folder 1 and you can then drag folder 2 into folder 1 and drop it inside.

Go to the home screen and you’ll notice that folder 1 is no longer visible but can still be accessed by opening folder 2.
If you want to remove folder 1, simply open the folder it is in and hold the icon. Then drag it out of the folder like you do with any app.
You may initially struggle to get it right, but once you get the hang of it, you can manage your iPhone home screen more effectively.
Leave a Reply