Windows is a great platform because of its capability to host a ton of applications and programs. But the downside is that it tends to slow down the user experience. Why? Particularly, because it allows many programs to run on startup. So when you turn on your computer first thing in the morning, many programs run automatically, even if they don’t need to. So multiple programs running on startup can considerably slow down your PC. Thankfully, there’s a way to tide over this situation. Simply disable the startup programs. In this tutorial, we’ll show you how to disable startup programs in Windows 11 easily.
How To Disable Startup Programs Via Settings
You can enable or disable the startup programs from the Windows Settings. To do this:
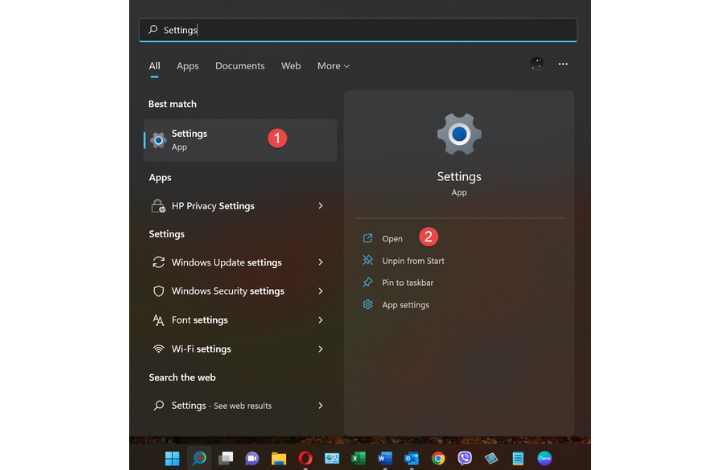
1. On the Windows 11 Taskbar, click the Search button.
2. In the Search window that opens up, click Settings. If you cannot find it on the window, in the Search bar, type Settings and click Open.

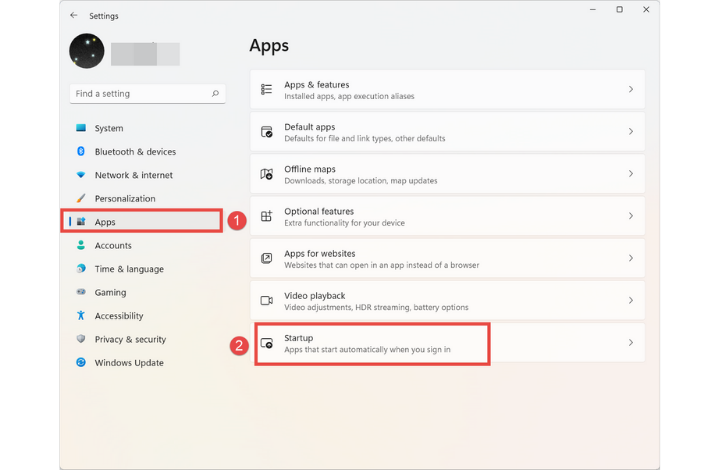
3. On the Settings window, on the left pane, select Apps and then on the right pane select Startup.

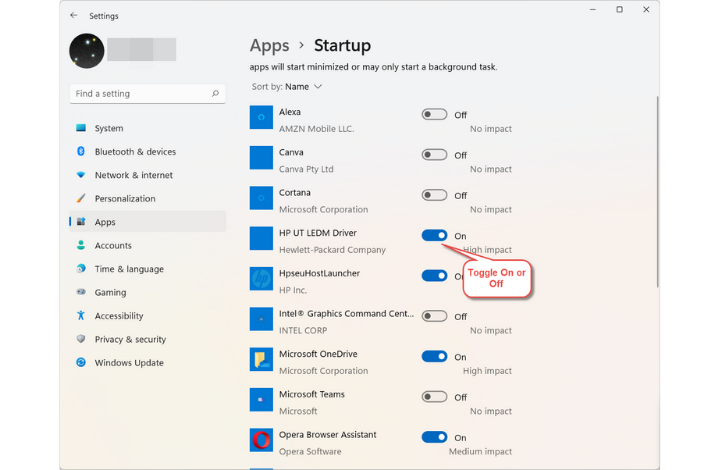
4. On the Startup Apps page, toggle programs Off by clicking the active toggle button next to each program.

That’s how you disable startup programs using Windows Settings.
* Note that it is best you disable applications you don’t use very often.
How To Disable Startup Programs Using The Task Manager
You can also use the Windows Task Manager to disable startup programs. To do this:
1. Open the Task Manager by pressing the Ctrl+Shift+Esc keys.
2. At the bottom of the Task Manager window, click the More details button.
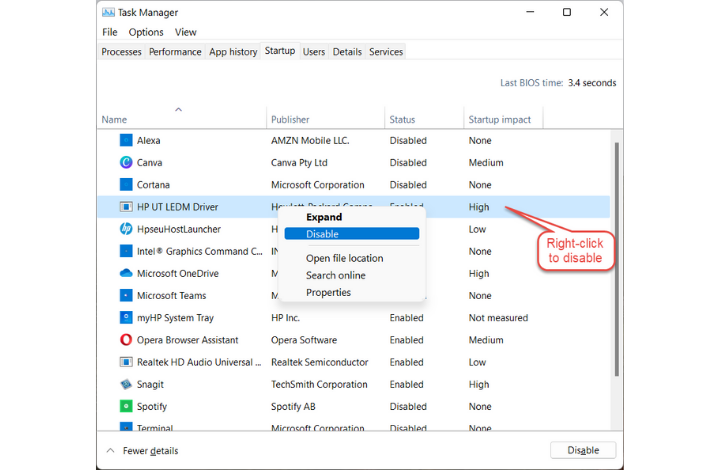
3. Select the Startup tab. The tab will list all apps that are running at startup.
4. Right-click the program you want to disable and click Disable.

So that’s how you disable a program on startup in Windows 11 using the Task Manager.
Leave a Reply