In today’s world, virtual assistants have become an integral part of our daily lives. Apple’s Siri has always been a popular choice for iPhone users, providing a convenient way to interact with their devices. However, with the advancements in artificial intelligence, there is now an opportunity to enhance Siri’s capabilities by integrating it with ChatGPT, a powerful AI chatbot developed by OpenAI. In this guide, we will walk you through the process of integrating ChatGPT with Siri, unlocking a world of possibilities for your virtual assistant.
Getting Started with ChatGPT for Siri
Before we dive into the integration process, there are a few things you need to take care of:
1. Create an OpenAI Account
To access the ChatGPT API, you first need to create an OpenAI account. Head over to the OpenAI website and sign up for an account. Once you have successfully created your account, you can proceed to the next step.
2. Obtain Your OpenAI API Keys
To integrate ChatGPT with Siri, you will need your OpenAI API keys. Follow these steps to obtain your API keys:
- Log into your OpenAI account on the OpenAI platform.
- Tap on the three lines icon at the top-right corner of the screen.
- Select your profile from the bottom of the Settings Menu.
- Tap on “View API keys” to access your keys.
Make sure to keep your API keys secure and avoid sharing them with unauthorized individuals.
How to Integrate ChatGPT with Siri
Now that you have your OpenAI API keys, we can move on to the integration process. Follow the steps below to seamlessly integrate ChatGPT with Siri on your iPhone:
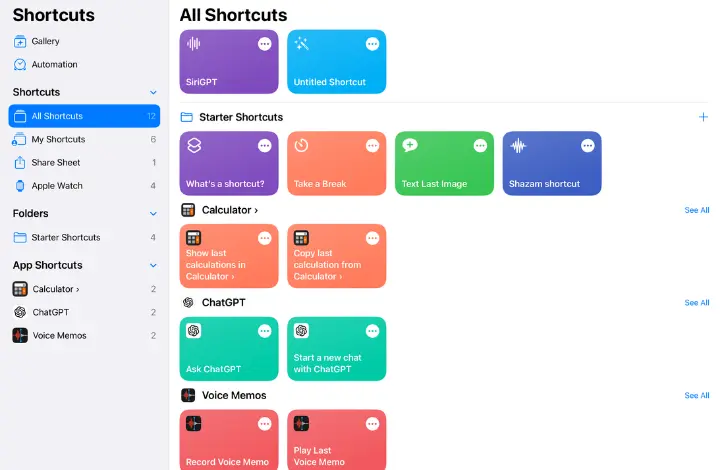
1. Download the SiriGPT Shortcut
To kickstart the integration, you need to download the SiriGPT shortcut. Here’s how to get it:
- Open the SiriGPT shortcut page.
- Tap on “Add shortcut” to add it to your shortcuts.
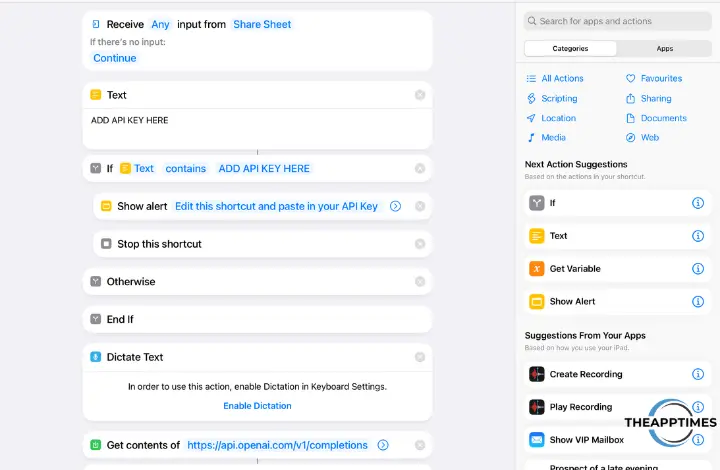
2. Add Your OpenAI API Key to the Shortcut
To enable the SiriGPT shortcut to communicate with the ChatGPT API, you need to add your API key. Follow these steps:
- Open the Shortcuts app on your iPhone.
- Find the SiriGPT shortcut and tap on the three dots to edit it.
- Locate the placeholder “ADD API KEY HERE” and paste your OpenAI API key in its place.
3. Enable Dictation for SiriGPT
To allow SiriGPT to process your voice commands, you need to enable Dictation within the SiriGPT shortcut. Here’s how to do it:
- Scroll down the shortcut flow chart until you see “Enable Dictation” underneath a red warning flag. If you don’t see it, you may already have Dictation enabled, so you can skip to the next step.
- Tap on “Enable Dictation” and toggle the switch to enable it. Then tap it again to confirm the settings.
4. Grant Speech Recognition Access
For SiriGPT to understand your vocal queries, you need to grant it access to Speech Recognition. Follow these steps:
- Go back to the Shortcuts menu and tap on SiriGPT.
- A Privacy warning will appear, asking for access to Speech Recognition. Tap on “Allow” to grant the permission.
5. Allow SiriGPT to Use Your OpenAI API
To run your prompts through ChatGPT, SiriGPT needs permission to send text to the OpenAI API. Follow these steps:
- Tap the SiriGPT shortcut again to run it.
- Ask a question, and a Privacy pop-up will appear asking for permission to access the OpenAI API. Tap on “Always Allow” or “Allow Once” (if you choose the latter, you will need to grant permission each time).
Interacting with SiriGPT
Now that you have successfully integrated ChatGPT with Siri, you can start interacting with the virtual assistant. Here’s how to use it:
- Tap “Done” after receiving an answer from SiriGPT.
- If you have more questions, tap “Ask Again” to continue the conversation.
- When you are finished, tap “Done” to end the interaction.
Enhancing the SiriGPT Experience
While you can access SiriGPT through the Shortcuts app, there is a better way to use it by assigning it to Back Tap. Follow these steps to launch SiriGPT with ease:
1. Open the Back Tap Menu
To assign SiriGPT to Back Tap, you need to access the Back Tap menu. Here’s how:
- Open the Settings app on your iPhone.
- Tap on “Accessibility.”
- Scroll down and tap on “Touch.”
- Select “Back Tap.”
2. Assign SiriGPT to Back Tap
Once you’re in the Back Tap menu, you can assign SiriGPT to either Double Tap or Triple Tap. Here’s how:
- Tap on either “Double Tap” or “Triple Tap,” depending on your preference.
- Scroll down and select “SiriGPT.”
3. Launch SiriGPT with Back Tap
Now, you can launch SiriGPT with a simple tap on the back of your iPhone. Here’s how to use it:
- Tap the back of your iPhone according to the assigned Back Tap gesture.
- SiriGPT will open, and you can ask a question.
- Tap “Done” when you’re finished.
Conclusion
Integrating ChatGPT with Siri opens up a whole new world of possibilities for your iPhone’s virtual assistant. With the power of AI, Siri becomes even more intelligent and capable of providing insightful responses to your queries. By following the steps outlined in this guide, you can seamlessly integrate ChatGPT with Siri and enjoy the enhanced virtual assistant experience. Give it a try and unlock the full potential of your iPhone’s Siri-powered virtual assistant!
Note: It is important to note that while ChatGPT is a powerful AI chatbot, it may not always provide accurate or reliable information. Exercise caution and verify the information obtained through SiriGPT with trusted sources.
Leave a Reply