If you own an iPad, chances are you’ve taken a screenshot or two for a specific purpose. But the iPad screen being what it is, you may not be able to cover the web page content in its entirety. That’s where this handy Safari feature (full page screenshots) comes in. If you’ve never used this feature before, here’s a quick rundown on how it works. Here’s how to take screenshots of entire web pages on your iPad in just a few minutes.
How to Take Screenshots of Entire Web Pages on Your iPad
Before you get started, you need to know that full page screenshots are saved as PDF files instead of PNG. If you must have the PNG version, you’ll need a PDF to PNG converter app or such to save the screenshot in the Photos app. Also remember, this feature only works on the Safari browser. You cannot try this on Chrome, Firefox, or another third-party browsers.
1. Take the Screenshot
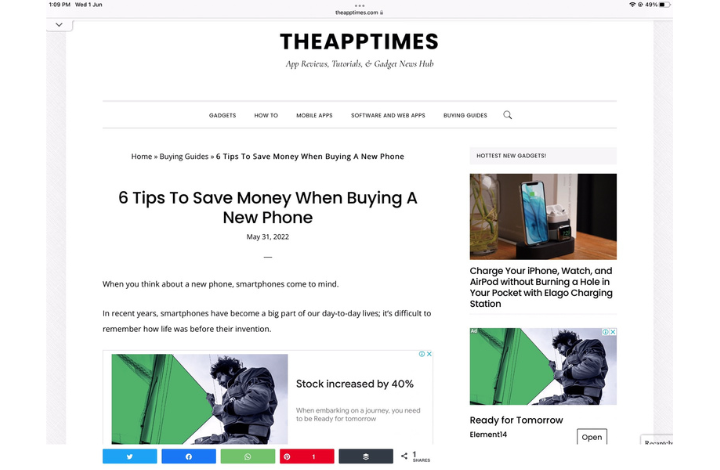
To take a screenshot on your iPad, open Safari and navigate to the web page that you want to capture. Then take a screenshot according to your preferred method of capture. I usually use the AssistiveTouch feature, but Siri, Voice Control or the shortcut buttons (top button and Volume button) is also fine.
2. Open the Editor
Once you’ve captured the image, a thumbnail preview window will be displayed on your screen, usually at the bottom left. Tap it quickly to open up the screenshot editor. If you don’t use this editor, the screenshot will only display what was visible on the screen when it was taken. So you need to make use of this editor to capture the entire web page.
3. Select the Full Page Option
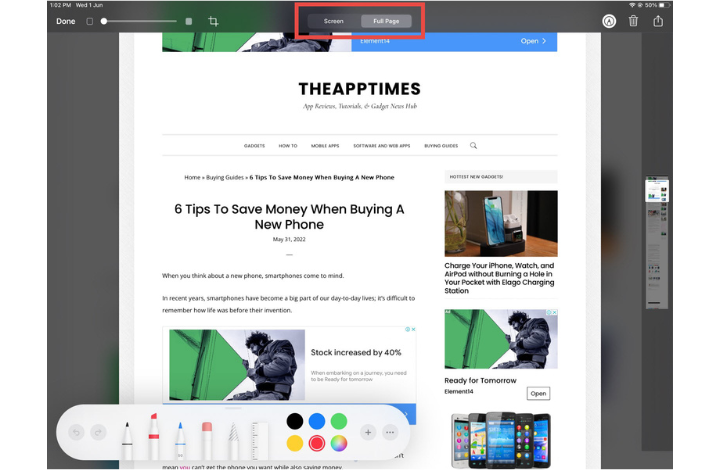
Once you’ve opened up the screenshot editor, you will see a couple of options at the top the screen. One being Screen and the other one being Full Page. Select Full Page. The editor will now capture the web page in its entirety.
4. Make Further Edits
Once the full web page is captured, you may want to make further edits to it such as cropping out the comments section, footer area, ads and such.
Tap and hold the highlighted section in the preview screen and then scroll up or down the page to make the edits.
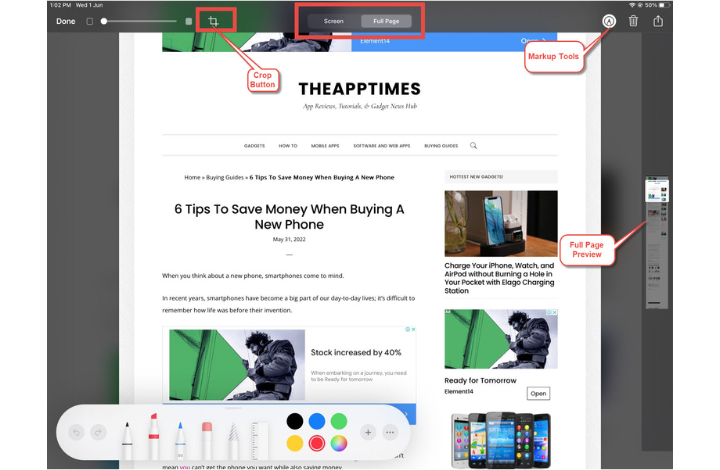
You can trim the length of the screenshot by tapping the crop icon at the top of the toolbar and making the necessary adjustments.
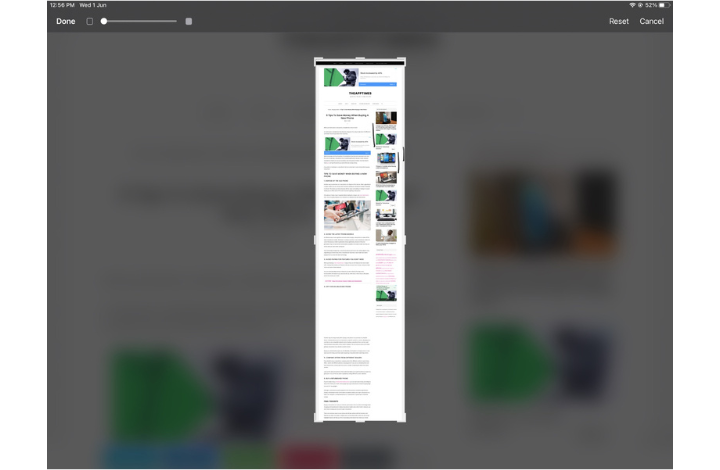
Tap Done when you have edited out all the unnecessary sections and are satisfied with the final screenshot. If you want, you can preview the screenshot of the webpage once again to make sure you have everything you need.
Additionally, you can also use the Markup tool to write on the image, magnify certain sections, add shapes to it, or draw on it among other things.
5. Share or Save the Screenshot as a PDF
Finally, you can now save the screenshot or share it with others. Remember, you can only save this screenshot as a PDF (owning to its large size) file to the Files App.
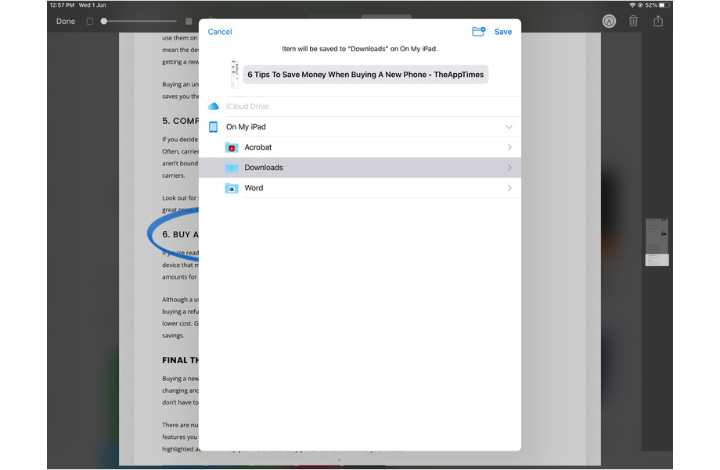
Choose Save PDF to Files from the menu if you want to save the image to Files. Tap on the name of the PDF to rename the document, if needed. Then, select the save location, such as On My iPhone, iCloud Drive or a third-party cloud service. Next, choose a directory and tap Save.
If you want, you can share the screenshot with other people right from the editor screen. To do this, tap the share icon to open the Share Sheet, from where you can share it via AirDrop, Messages or other third party apps.
6. View the PDF in Files
If you want to see the screenshot, you can now go to the Files app and find the PDF file in the saved directory.
So that’s how you take screenshots of entire web pages on your iPad.
Leave a Reply