In our previous Learn PowerPoint series, we showed you how to create and manage slides in your PowerPoint presentation. In today’s post, I’ll show you how to apply themes to a presentation. You can also download the file given at the end of this post to practice the activities you learned in this PowerPoint tutorial.
Note: This activity has been performed on a Windows 10 PC running PowerPoint 2016. If you are using an earlier version of PowerPoint, there may be some variation in the activities and steps.
Every presentation that you create is governed by a theme. A theme is simply a combination of colors, fonts, styles and background graphics that is applied to the different elements in the presentation that gives it a unique look.
Even a blank presentation has a theme called the Office theme. If you pay attention, you’ll notice that the theme has a white slide background, Office fonts Calibri Light for the headings and Calibri for the body along with a standard accent color.
By default, PowerPoint contains a Themes gallery that offers around 30 different themes that you can use right off the block. Each theme comes with its own design, font, and color scheme. You can find this gallery on the Design tab.
A closer look at the thumbnails in the gallery will show you the font style of the theme in the form of an uppercase and lowercase letter A (Aa). You can also see the color scheme in the form of colored blocks over the title slide. The thumbnail will also indicate the background graphics used for the presentation.
Themes don’t have to be applied to the entire presentation. They can be applied only to a specific section of the presentation if that’s what you want. You can also mix and match different colors, fonts and effects to create your own color scheme. Finally, if you don;t like any of the default themes, you can create your own theme.
The Live Preview feature lets you see how your presentation would look when a theme is changed. All you need to do point to a theme on the gallery and wait. PowerPoint will temporarily apply the selected theme to the slide allowing you to see what it will look like when applied. This allows you to try various themes until you find the most ideal fit for your presentation.
Let’s see how you can apply a theme to a presentation.
How to Apply Themes to a Presentation
1. Open your PowerPoint presentation or open a blank presentation.
2. Select the Design tab. In the Themes group, click the More button.
3. Hover over the theme thumbnails in the gallery to preview the themes.
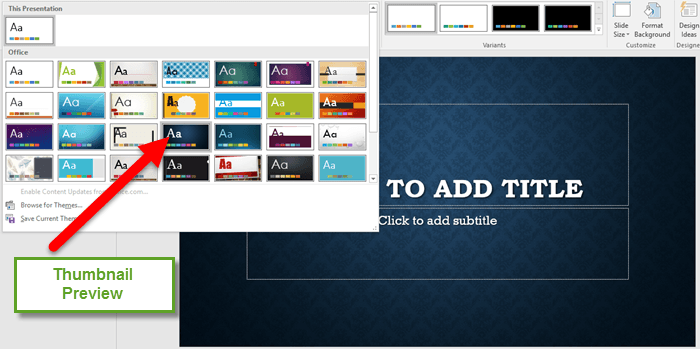
4. Click on a theme thumbnail to apply it to the presentation.
How to Change the Color Scheme of a Presentation
On the Design tab, in the Variants group, click a thumbnail variant to change the color scheme of the presentation.
Alternatively,
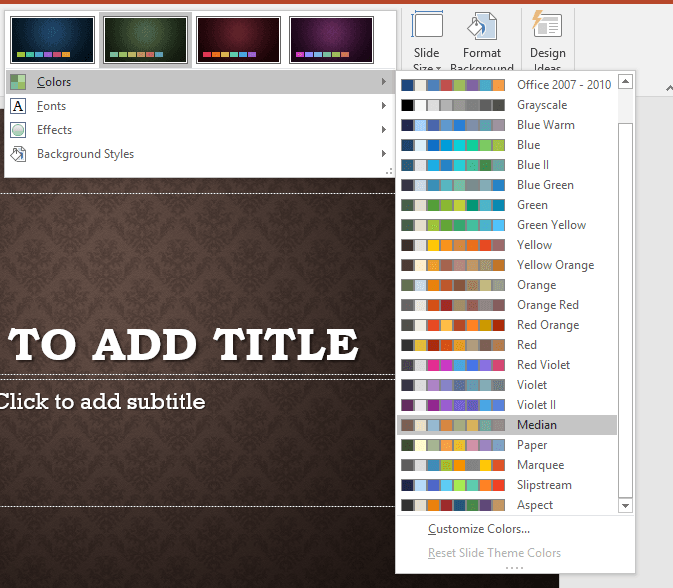
1. On the Design tab, in the Variants group, click the More button.
2. From the Variants drop-down menu, click Colors, and click a color scheme you want to apply.
How to Change the Font Style of a Presentation
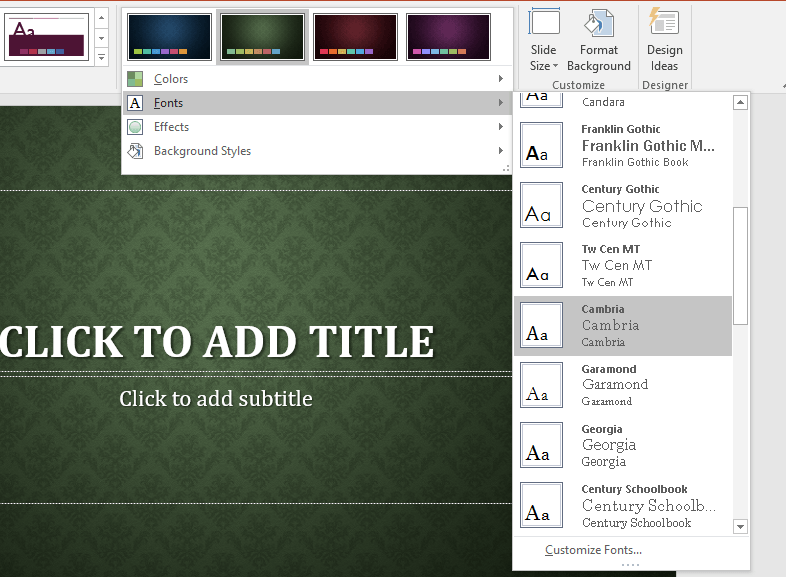
1. On the Design tab, in the Variants group, click the More button.
2. From the Variants drop down menu, click Fonts, and then click the font set you want to apply.
How to Change the Effects of a Presentation
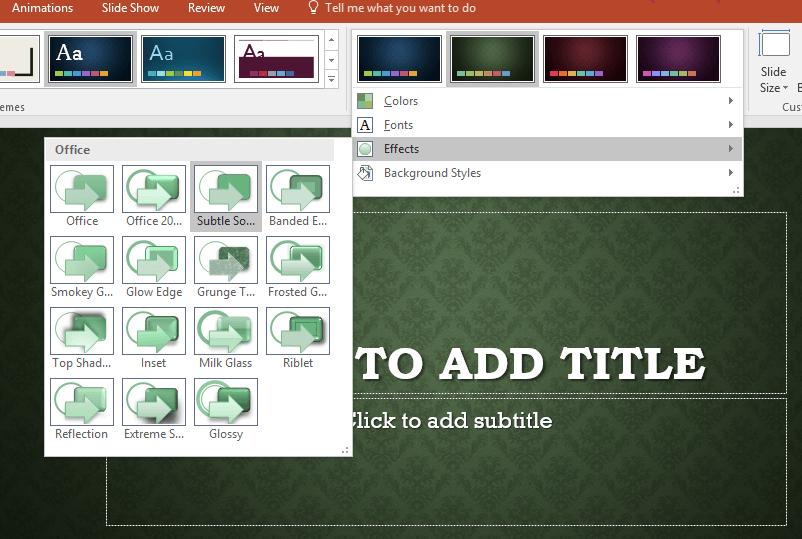
1. On the Design tab, in the Variants group, click the More button.
2. From the Variants drop down menu, click Effects, and then click the effect you want to apply to your presentation.
How to Apply a Theme to only a Part of the Presentation
If you want to apply a theme only to a part of the presentation, you first need to divide your presentation into sections. If you’re not sure about how to create sections, you can refer to this tutorial. The steps outlined should work in PowerPoint 2016 as well.
1. Click the section header to select the section.
2. On the Design tab, from the Themes gallery, select the theme you want to apply to that section.
How to Change Slide Backgrounds
Every PowerPoint theme includes a standard background. This background may be a color or it may include a background graphic. You can customize the slide background by removing the background graphic or color and filling it with either another color, a color gradient, a texture or an image of your choice. Here’s how you do it.
1. On the Design tab, in the Customize group, click Format Background.
2. This will display the Format Background pane with plenty of options. Here you can select from a number of options.
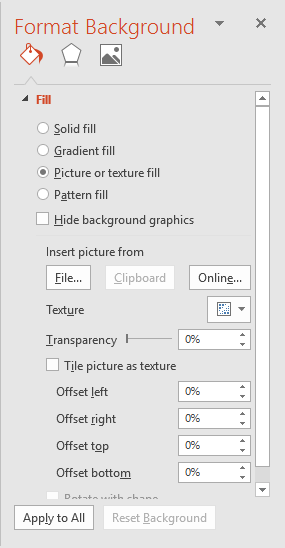
Solid fill: A solid color background is a great choice if you want your text to be the focus of your presentation as it allows for better readability. To apply a solid fill:
1. In the Format Background pane, click Solid fill.
2. Click the Color button to display the color palette. Select a theme color variant, a solid color, a recent color, or click More Colors and select a custom color.
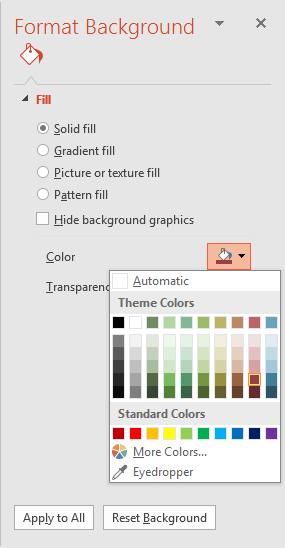
3. Adjust the Transparency slider to get the required transparency effect.
Gradient fill: If you want to make the slide slightly more attractive, you can use a color gradient. To apply a gradient fill:
1. In the Format Background pane, click Gradient fill.
2. Click the Preset gradients button, and then click a gradient option based on the current color palette.
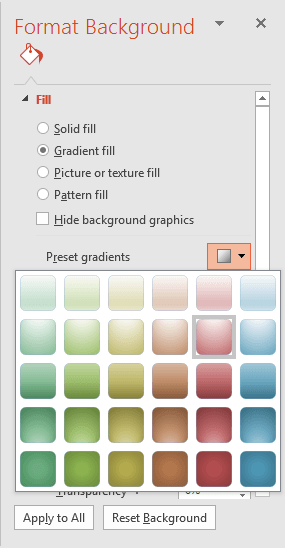
3. Optional : Click the Type drop down list and select an option. If you select Linear, you can specify the angle you want the gradient to move by entering the value in the Angle box. If you want to add gradient stops, in the Gradient Stops field, click the Add gradient stop button. Then reposition the marker on the slider or simply click the slider in the approximate location where you want to insert the gradient stop. If you want to remove the markers, just select the ones you want to remove and click the Remove gradient stop button.
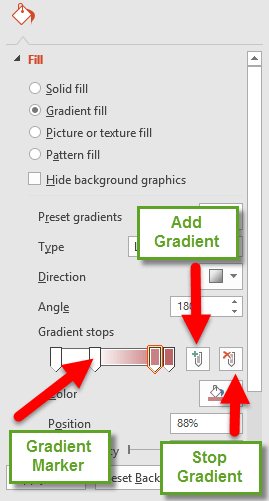
4. Optional : Click the Direction drop down list and select a direction you want the gradient to flow.
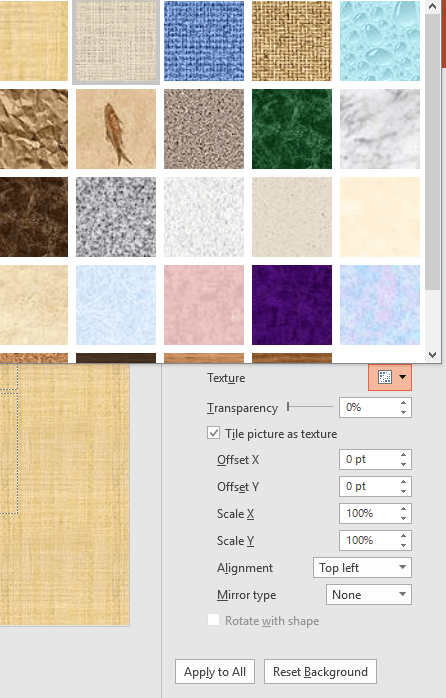
Picture or texture fill: If you want something more attractive than a solid color or a color gradient, you can use a texture or pattern. Another option that you can use is a picture of a textured surface. To apply a textured background:
1. In the Format Background pane, click Picture or texture fill.
2. Click the Texture button to display the texture gallery and select a texture of your choice.
3. If necessary, move the Transparency slider to adjust the transparency.
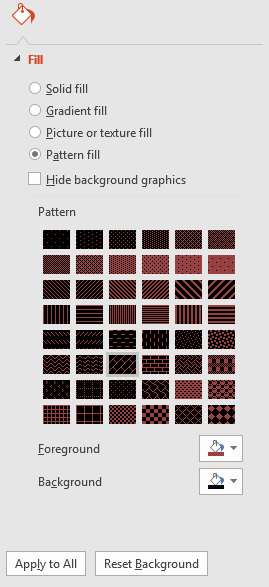
Pattern fill: Finally, there’s also the option to use a simple pattern. PowerPoint offers around 48 patterns for you to pick from. To apply a patterned background:
1. In the Format Background pane, click Pattern fill.
2. From the Pattern palette, select from one of the 48 patterns.
3. Click the Foreground button and select the primary pattern color.
4. Click the Background button and select the secondary pattern color.
Once you have selected the desired background, at the bottom of the pane, click Apply to All to apply the formatting to the slide background.
How to Remove a Slide Background Graphic
1. Open the Format Background pane.
2. In the Format Background pane, check the Hide background graphics check box.
Practice Task
1. Open the Learn PowerPoint How to Apply Themes to a Presentation.pptx file.
2. On slide 1, click the slide title. Note down the theme font.
3. Apply the Vapor Trail theme to the presentation. Again, note down the theme font. Notice how it is different from the standard theme.
4. Apply the third variant of the Vapor Trail theme to the presentation. Notice that the slide background is now white.
5. Apply the fourth variant of the Vapor Trail theme to the Slide Backgrounds section of the presentation.
6. Select slide 1 and apply a Preset gradient fill of Top Spotlight – Accent 1 to the slide.
7. Save and close the presentation.
Subscribe to our blog to learn more stuff on how to leverage apps in your everyday life.
Leave a Reply