Have you thought what will you do if you ever lose some of your really precious photographs (such as photos of your new born baby or your wedding)? Digital images are lost because of the corrupt camera card, or bad data storage device, wherein they were saved, or due to accidental deletion of photos from your Mac machine or camera card. Well, for such cases backup works as a boon. However, the loss can be very tragic in the absence of backup, but if you timely use a professional photo recovery software like Stellar Photo Recovery for Mac, then you can easily restore your invaluable image files.
Stellar Phoenix Photo Recovery Software
Overview:
Stellar Phoenix Photo Recovery Software 8.0 is an efficient tool that supports almost all types of digital data storage media like memory card, pen drive, Mac – laptop or desktop, iPod, internal and external hard drives, etc. The tool generally takes 10-15 minutes to scan a memory card of 8GB and during the scanning it provides you the preview of all the recoverable photos. If you start the recovery process immediately after the loss, then you can expect cent percent result. The software not only recovers your lost or deleted photos, but it is also efficient enough in performing the recovery of lost or deleted videos, audios, and songs as well.
Design and Features:
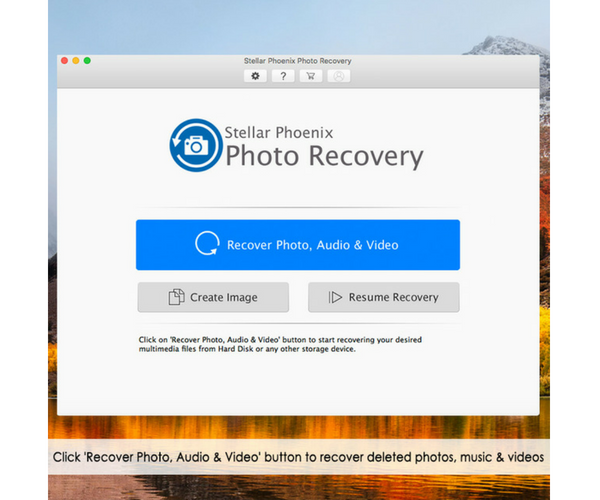
I used this software to recover photos that I deleted, (about a 100 of them) from the SDHC card of my digital camera and found it to be one of the best among other software provided under the same category. This is because of its simple and consistent user interface that does not let me feel that I am using some data recovery tool and that too for the first time. The self explanatory buttons and options of the software made me perform the recovery of my photos effortlessly. The main interface that you encounter after launching the software consists of three options:

The first option – ‘Recover Photo, Audio, and Video’ is to perform the recovery of lost or deleted photos, videos, and audios, which I selected for the recovery. The ‘Create Image’ option is used to create the image of storage device like memory card, pen drive, etc. This image can later be used for restoring the lost images. The last option, i.e. ‘Resume Recovery’ is to restart the recovery process from previously saved scan information or saved image file.
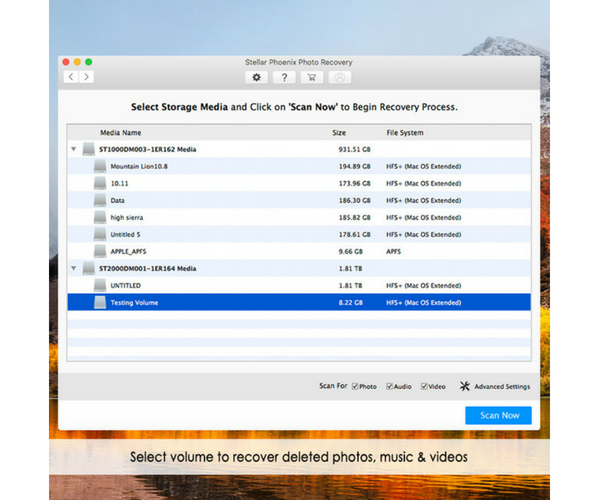
However, after selecting the option to recover lost photos, I was greeted with an interface that was containing the list of all drives and logical volumes present in my hard drive. Apart from this, it also lists the attached external drives as well:

I selected my affected SDHC card (that I attached) and clicked the ‘Scan Now’ button. If you are an advance user, then you can also select ‘Advance Scan’ option (provided in this screen only) of the software for performing the recovery of photos, videos, and audios at specific region of storage media or of specific type. If you have created the image of your data storage device, then you can load that image to perform recovery from it by selecting the ‘Load Image’ option.
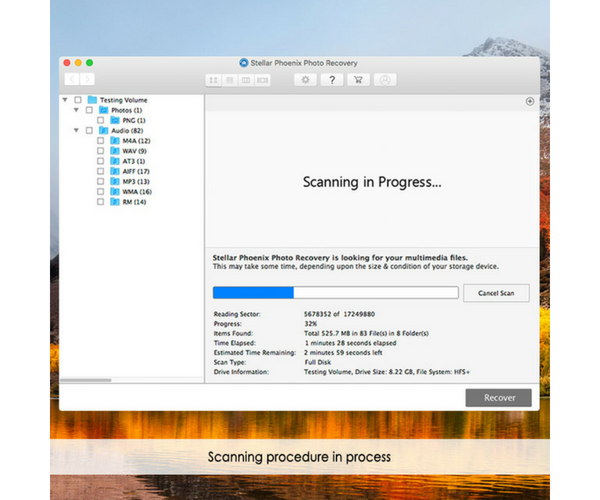
After clicking the scan option, the software started scanning my SDHC card and gave simultaneous preview of all the deleted photos on its interface during the scan itself:

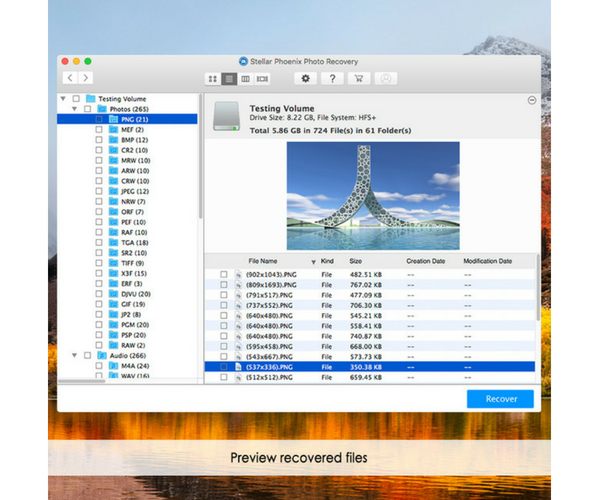
Upon completion of the scanning process, the software listed all the recoverable files at the left pane of the current interface in different folders according to their category; like all the photos in ‘Photos’ folder, music files in ‘Music’ folder, and so on.
Selecting a particular folder lists all the files present in it at the right-bottom pane of the software. You can click a file to see its preview in the upper right pane and can check or uncheck the files for selecting or deselecting them respectively.

Since the tool listed all the images and video files that I deleted in the recent past and some of them were backed up in my Mac, I particularly selected those which I deleted most recently. After selecting the files, I clicked ‘Recover’ button to recover these files.
After this, I was welcomed with an interface wherein I got a dialog box that was asking me to specify the location to save the recovered files. I selected a location on my Mac and the photos were saved at that specified location. Then I closed the software and went to the location where I saved the images. All the images that I selected to recover were there.
System Requirements:
The minimum system requirements of this software are:
- Processor: Intel G3 or later
- RAM: 1GB recommended
- Hard Disk: 100 MB of free space
- Operating System: macOS High Sierra 10.13, 10.12, 10.11, 10.10, 10.9,10.8,10.7 & 10.6
Pros:
Stellar Phoenix Photo Recovery Software 8.0 supports the recovery of most of the multimedia files and is compatible with various data storage devices like hard drive, pen drive, memory card, etc. The simple, comprehensive, and intuitive user interface of the software makes it understandable by all whether he/she is a novice computer user or a professional with high understanding of computers and technology.
Cons:
The tool works well and is comparatively loaded with many features; however, the high price of this software in comparison to various affordable tools of this category makes buyers think twice.
The Verdict:
The effectiveness of the recovery process and high scanning speed of all types of data storage media make Stellar Phoenix Photo Recovery 5 a best buy for general home users as well as all those who are into the field of photography and want something really reliable and fast for recovering their multimedia files like photos and videos.
What’s been your experience with Stellar Phoenix Photo Recovery Software?
Leave a Reply