Want to remove songs from your iPhone but not your iTunes library? This quick guide will show you how to do it using the Music app as well as from your Settings section.
When you delete songs from your iPhone they will be available in your iTunes library on your PC or Mac. If you only want a few songs to be deleted, you can do so using the Music app but if you want to delete large collections, its best to do it via the Settings.
How to Remove Songs from Your iPhone via the Settings
This is the quickest and easiest method to remove songs from your iPhone.
1. Go to Settings and tap General.
2. Tap Storage & iCloud Usage.
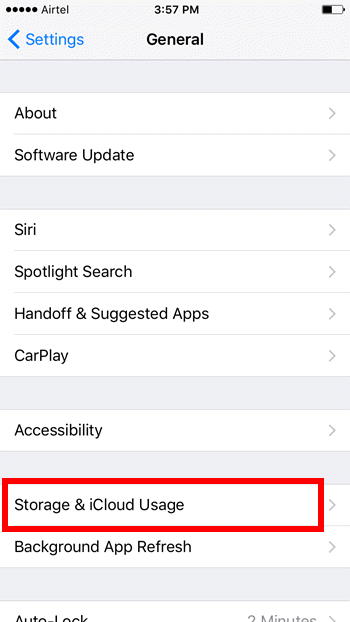
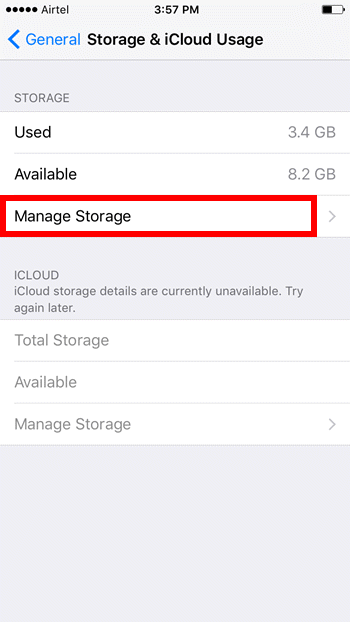
3. On the next screen, in the Storage section, tap Manage Storage.
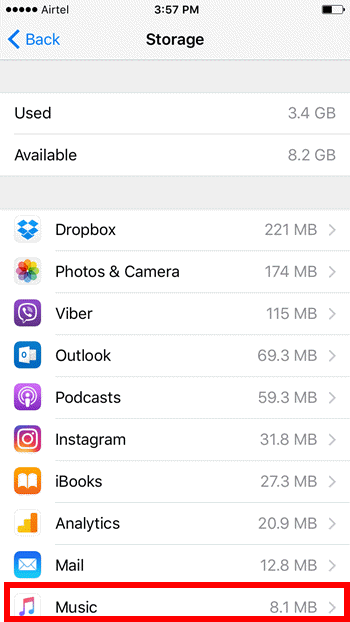
4. On the next screen, from the list of apps, select Music.
5. If you want to delete all the songs in one go, slide the All Songs tab to the left and tap Delete.
6. Or, select slide the individual songs to the left and tap Delete to remove individual songs.
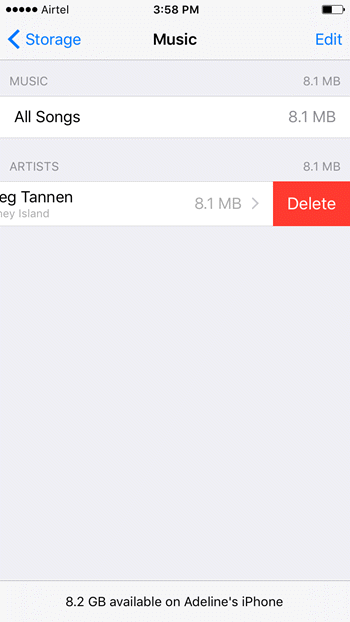
This will remove songs from your iPhone but retain them in iTunes. If you want the songs back, you can resync your iPhone with iTunes any time to get it back.
How to Remove Songs from iPhone Using the Music App
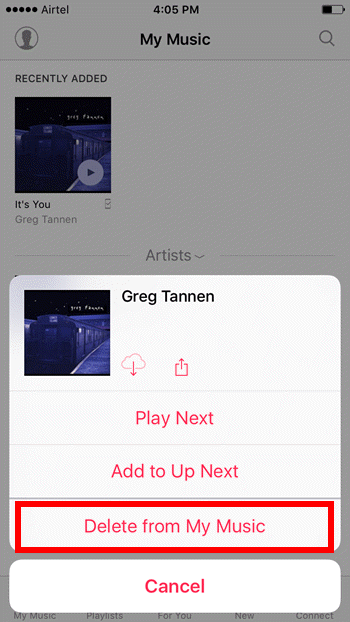
If you want to delete individual songs, or songs by genre, album, and you can use the Music app to do so. Again the deleted songs will still be available in iTunes for you to re-sync should you want it back on your device. To do this:
1. Open the Music app and navigate to the app you want to delete.
2. Tap the three dots next to the song title to bring out a pop up menu.
3. From the menu, tap Delete from My Music.
That’s it! 2 quick and easy ways to remove songs from your iPhone.
If you want more quick and easy tricks and tips for your iPhone, be sure to check our archives section.
Leave a Reply