Regular use of the PC results in the accumulation of junk files and you may find yourself spending time manually clearing them up. For instance, you may have to regularly clear the temporary files, or the Recycle Bin. Although you can do these tasks manually, automating the task will save you time and effort. The Task Scheduler in Windows 7 allows you to set a schedule to perform certain tasks automatically at the scheduled time. In this Windows 7 tutorial, you will learn how to schedule your PC to automatically empty the Recycle Bin and save yourself valuable time.
How to get your PC to Automatically Empty the Recycle Bin
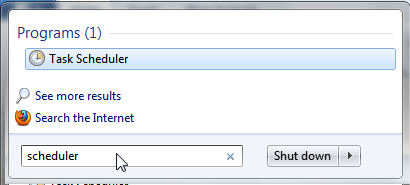
1. Click Start and in the Search box, type scheduler.
2. In the Search list, under Programs, select Task Scheduler.
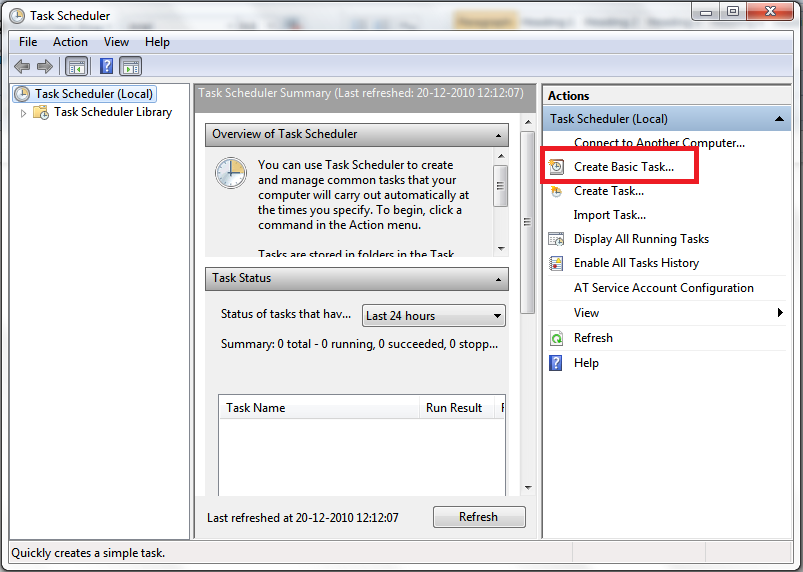
3. In the Task Scheduler window, in the Actions pane, click Create Basic Task.
4. In the Create a Basic Task wizard, in the Name box, enter a task name and in the Description box, enter a task description and click Next.
5. In the Task Trigger page, select a task start time option and click Next.
6. In the next page, enter the specific time details. This will vary depending on the option you select in the previous page. For instance, if you select Weekly in the previous page, the days of the week will be displayed in the current page. In this instance, I have selected Monthly, so on this page, I will select the specific months and days on which I want my PC to perform the task. Then click Next.
7. In the Action page, select the Start a program and click Next.
8. In the Start a program page, click Browse, and in the Open dialog box, in the File name text box, enter cleanmgr.exe and click Open.
9. Verify that the correct program is displayed in the Program/Script text box and click Next.
10. In the Summary page, click Finish.
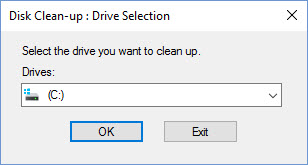
NOTE: At the scheduled time you may see a Disk Cleanup pop-up asking you to select a drive, like shown in the image below. If you see this pop-up, ensure that the C Drive is selected and click OK.

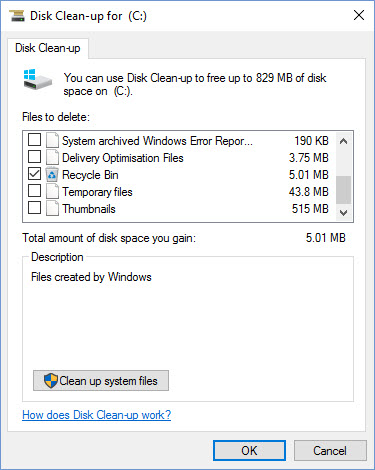
The pop-up will quickly scan your C Drive and then display the Disk Clean-up for (C:) window. Windows will recommend a few clean up options here. Uncheck all the options that are displayed by default and check Recycle Bin. Then click OK to complete the process.

Have you used the Task Scheduler in Windows 7 to schedule tasks? If you have, share them with us. If not, make use of this tutorial, and let us know how it has helped you to streamline your work.


Good afternoon from a cold wet and windy Shetland Isles.
I have set up the Automatic Recycle Bin emptying as described on your article .
Before it started, it opened up a window, asking me what drive do I want to clean, suggesting C drive.
It didnt say anything about the Recycle Bin though, so I chickened out.
Whats your thoughts on this please Adeline ?
Kind regards
Phil Mortimer
Hello Phil,
Its nice to hear from you from wet and windy Scotland. 🙂 I hope the weather lets up soon so you can enjoy the lovely Spring sunshine.
As far as the tutorial goes, yes… you need to select C Drive, then select Recycle Bin from the next window. make sure to deselect the other options. I have updated the tutorial so you can see what I’ve done.
The last part of the task is a bit of manual work though and I’m not aware of a process where that can be automated as well.
Hope the explanation helps.
Cheers,
Adeline