Windows 10 offers plenty of great features that can be customized to match our working requirements. I briefly covered some of the ways in which you can customize Windows 10 in a previous post, but today, I want to talk about another handy feature in the operating system; the battery saver mode.
This feature is designed to extend the battery life of the laptop or battery when the battery starts to run low. Windows 10 will automatically make this change for you but you can configure Windows 10 battery Saver mode so that you have more control over how it works. Let’s see how.
Functions of the Battery Saver Mode
Just like how the battery saver works on an Android or iOS device, the Windows 10 battery saver makes a few changes to the Windows 10 settings to extend the battery life. For instance, one of the things it does is automatically lower the display’s brightness, saving you quite a bit of power. This feature also turns off the push notifications from universal apps you downloaded from the Windows Store.
The Battery Saver mode is usually triggered when the laptop or tablet reaches 20% battery life. When you plug in your device and start recharging, the feature will automatically get deactivated.
How to Turn On Battery Saver Mode
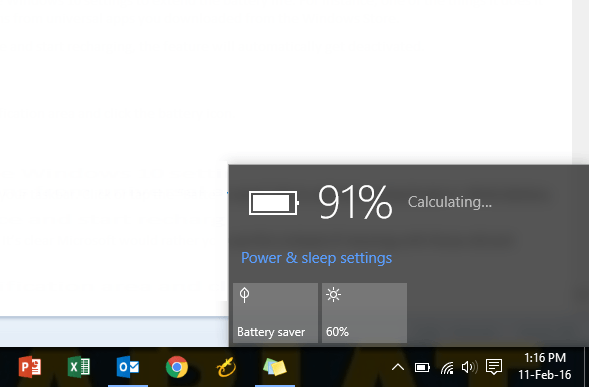
You don’t have to wait for Windows to trigger the Battery Saver mode. You can turn it on yourself. with Windows 10 Microsoft has made it just a click away. Just head over to the notification area and click the battery icon .

In the pop-up screen, tap Battery saver. When the Battery saver mode is enabled, you’ll see a green leaf icon over the battery icon.
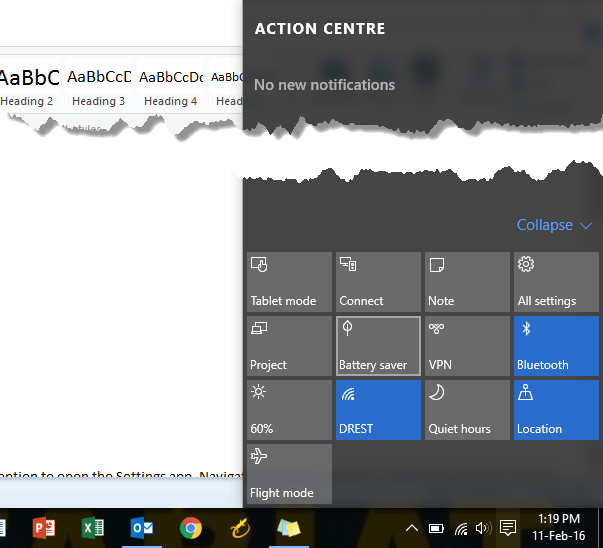
You can also find the Battery saver quick settings in the Windows 10 Action Center. Click the Notification button in the notification area and tap Battery saver to get there.

How to Configure Battery Saver in Windows 10
You can configure when Battery Saver activates and what it does when it gets activated. To do this:
1. Open the Start menu and select Settings.
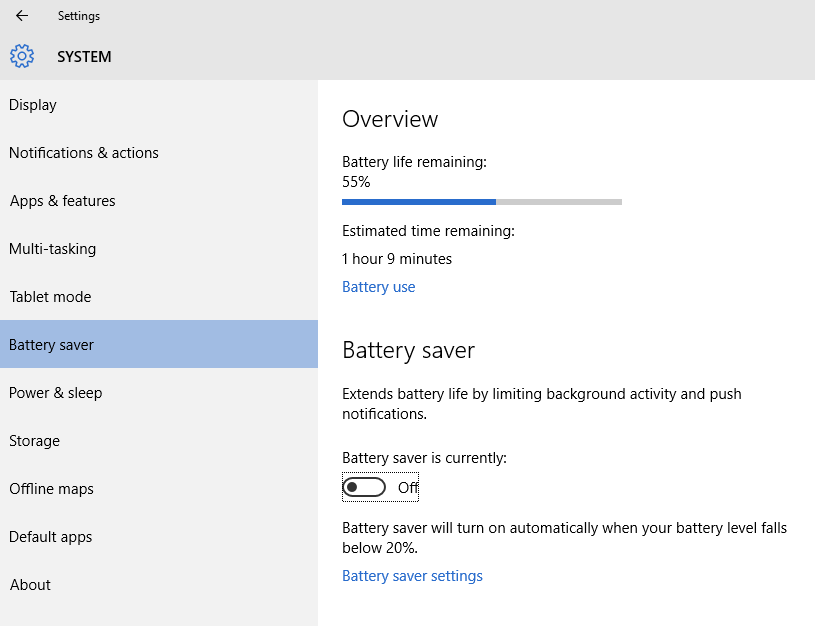
2. On the Settings screen, select System and go to the Battery saver tab.
3. In the Battery saver screen, you have several options. Here you can do the following:

Tap the Battery save settings link.
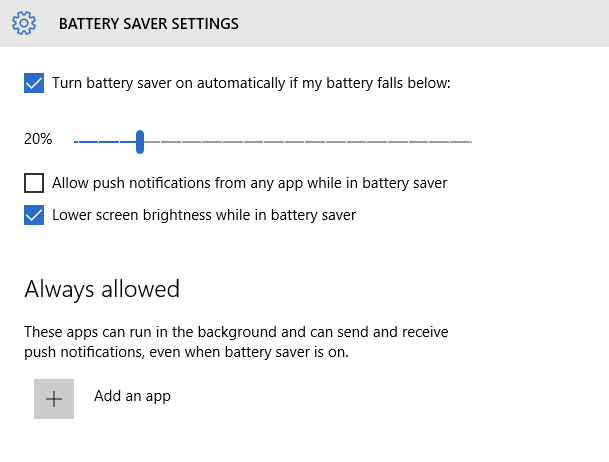
In the Battery saver Settings screen, you can adjust the battery percentage at which Windows will trigger or activate it. For instance, you can move it from the default 20% to 40%.
You can disable the Lower screen brightness while in battery saver option, but it is better to leave this option untouched.

You can also choose to allow certain apps to keep running in the background in the Battery saver mode. To do this: Click Add an app and then in the Always Allowed section, select the app you want to run in the background. You can also allow push notifications from certain apps while in the battery saver mode. You’ll lose a bit of battery life, but that particular notification might be a really important one you don’t want to miss out on. Its nice that Windows 10 doesn’t blanket ban push notifications allowing you enough freedom to choose the ones you want.
The Battery Saver mode is actually quite useful on a Windows Phone than compared to the PC, but it may still be worth configuring if you’re always on the move and every bit of battery life helps, especially if you’re nowhere near a plug point!
Leave a Reply