Today, practically everyone starts off the day checking their email. However, one of the most hated things about the task is the umpteen number of unwanted messages that land in the Inbox everyday from spammers and like-minded rogues. You can always remove subscriptions to newsletters you subscribed to earlier, but what about annoying people who simply cannot take no for an answer. Well, if you’re using Gmail, you can block them. In this post, we show you how to block email addresses in Gmail on the web and on your Android.
How to Block Email Addresses in Gmail on Web
1. Open up Gmail and open up the email from the person you want to block.
2. Click the Reply drop down button at the top of the message.
3. From the options available, click Block [Sender’s name]
4. In the confirmation screen that pops up, click Block once again.

That’s it! All future email messages from that sender will be marked as spam and removed.
How to Block Email Addresses in Gmail on Android
If you are using Gmail app on Android, then, here’s how to block email addresses in Gmail on Android.
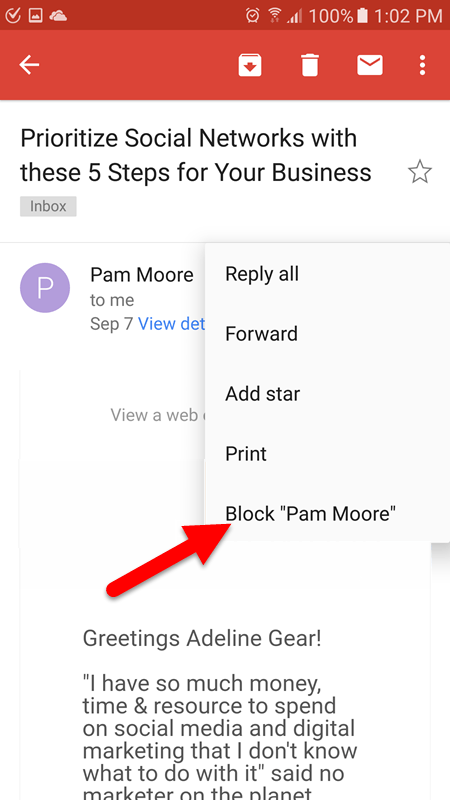
1. Launch the Gmail app and open up the message from the sender you want to block.
2. Tap the 3 dotted menu at the top of the screen that is next to the Reply button.
3. From the drop down menu, tap Block [Sender’s name]

The sender’s email address will be marked as spam and all future messages from the person will be blocked.
How to Unblock an Email Address You Blocked in Gmail
If you accidentally blocked someone in Gmail and want to unblock them at a later point in time, here’s what you need to do.
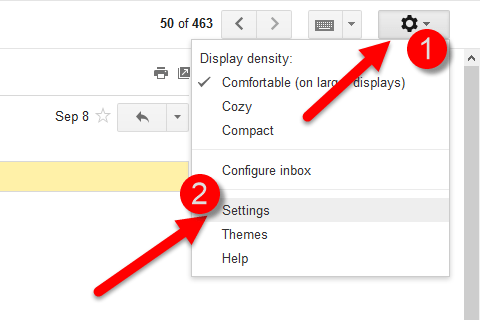
1. Login to your Gmail account and click the Cog icon to navigate to Gmail Settings.

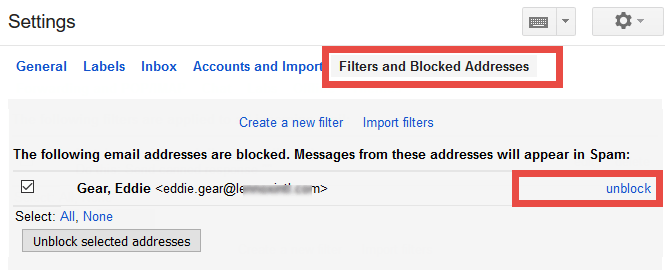
2. In the Settings page, click Filters and Blocked Addresses.
3. The next screen will display a list of all the email addresses you blocked.
4. Click Unblock against each of the email addresses you want to unblock.

If you want to unblock an email address from your Gmail app on Android, you need to find an email from that sender. Tap the 3 dotted menu and select Unblock [Sender’s name] to remove the setting.
If you are looking for more tips and how tos on Gmail, be sure to visit our Gmail Archives section.
Leave a Reply