Want to Hibernate your PC but can’t find the option? In this tutorial, we’ll show you how to add Hibernate to the Start menu in Windows 10.
The Hibernate option in the Windows operating system is a feature that lets you turn off your PC without closing all open windows and programs. In the Hibernate state, the PC saves all your open programs and documents to the hard disk and then turns off the PC. This saves you power when the PC is not in use, while still allowing you to get back to where you left off previously.
In Windows 10 however, if you head to the Power button, you’ll notice that Hibernate is not available by default. You have Sleep and Restart options but no Hibernate option.
If you hate closing all your open files and programs before shutting down your PC, which is the best way to do it by the way, you can use the Hibernate option. But first, you need to bring it back. Luckily, In Windows 10, getting is back is a simple task. Here’s how to do it.
How to Add Hibernate to the Start Menu in Windows 10
1. Click inside the Cortana or Search box on the Windows 10 taskbar and type Power Options. Click on the search result that shows a Control Panel setting.
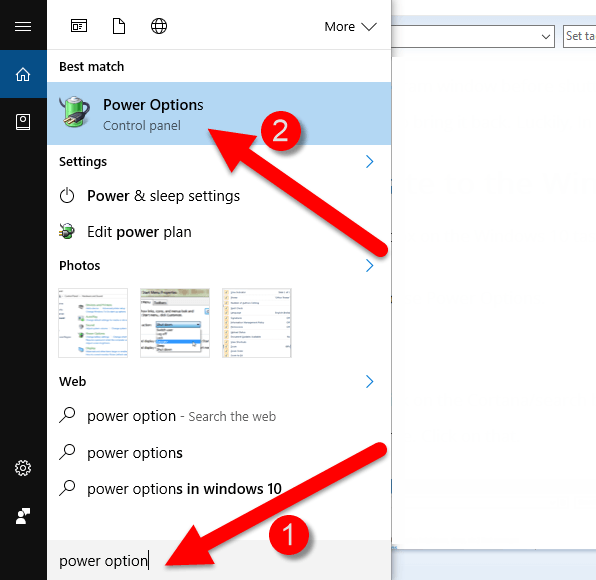
Alternately, you can right-click the Start button and choose Power Options.
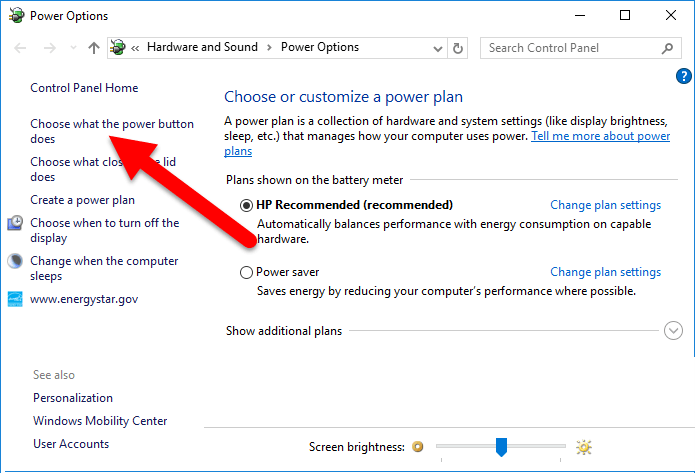
2. This will open up the Power Options window setting.
3. On the left pane of the window, click Choose what the power buttons does.
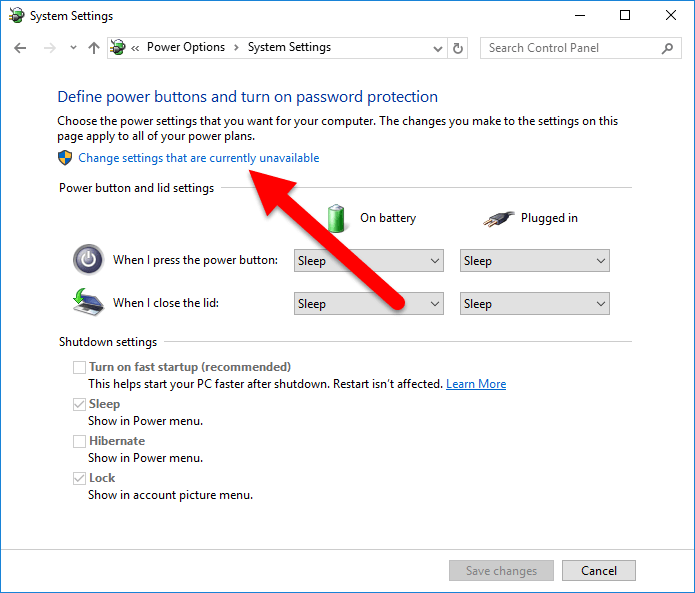
4. In the next screen, click Change settings that are currently unavailable.
5. The Hibernate option will not become activated. Check the box to add it to the Power options in the Start menu and click Save changes.
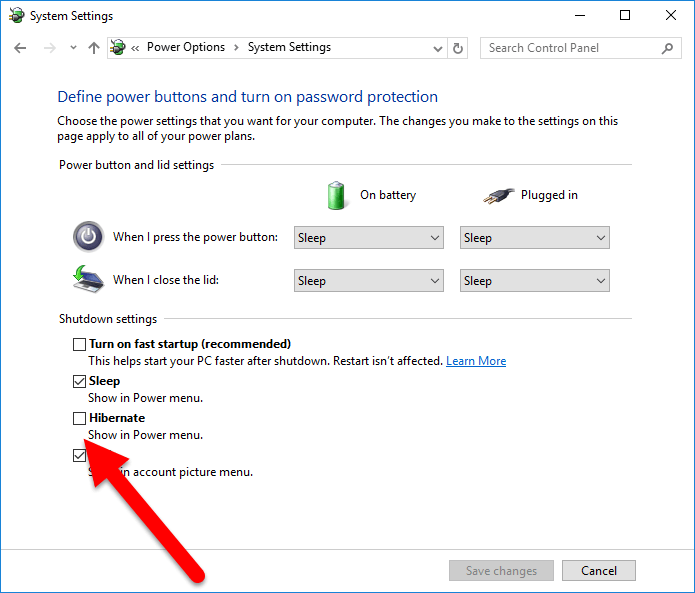
Now click the Start button and then click the Power button and you should see the Hibernate option.
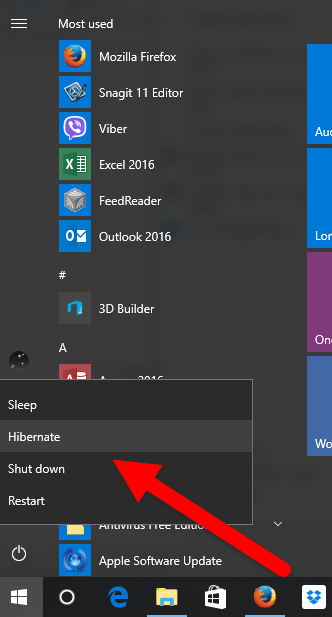
That’s it!
If you found this tutorial useful, be sure to check out our archives section for more useful Windows tutorials and tips.
Leave a Reply