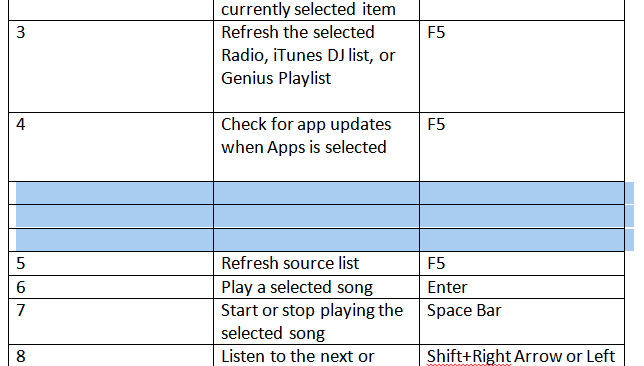
If you use tables in a Word document, you probably know how to insert rows in the table. For instance you can use the commands in the Table Tools Layout contextual tab, or simply press Tab until you have the desired number of rows. You can even use options in the right-click context menu to achieve the desired result. But have you ever had to add multiple rows in a table in Word? In this tutorial, I’ll show you how to add multiple rows in a table in Word.
For the purpose of this tutorial, I’m using Word 2016, but this should also work in previous versions of the software, particularly Word 2010 and Word 2013.
How to Add Multiple Rows in a Table in Word
The trick to adding multiple rows in a single go is to determine the number of rows you want to add, where you want to add it, and then select the number of rows in the existing table. For example, I have a table with 10 rows. I want to add 3 rows above Row 5. Here’s how to add 3 rows above row 5.
1. Select rows 5 6 and 7. (If you want to add 5 rows select rows 5,6,7,8,9)
2. Right-click and from the context menu, choose Insert->Insert Rows Above.
Now three rows have been added to the table according to your specification.
You can also use the commands in the Table Tools Layout contextual tab to insert multiple rows. After you select the desired number of rows, from the Rows & Columns group, click Insert Below or Insert Above to add the desired number of rows.
Of course, this process also works for adding multiple columns, and while this procedure may be something that is familiar to you, you may sometimes forget a quicker way of accomplishing a task, and I hope this tutorial serves as a good reminder.


Leave a Reply