Microsoft is out with yet another awesome holiday idea; creating personalized holiday gift boxes to hold small gifts like chocolates, pendants, earrings and more. You could also make these gift boxes when you plan to hold a party and give away mementos to all your guests. In this Microsoft Publisher tutorial, you will learn how to create holiday gift boxes using Microsoft Publisher.
How to Create Holiday Gift Boxes Using Microsoft Publisher
1. Download the holiday gift box publisher template from Office.com.
2. Open the template in Microsoft Publisher 2010.
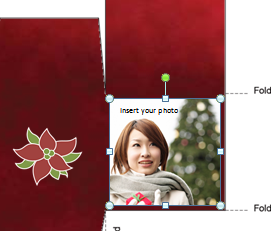
3. Insert your photo in the text box provided to insert pictures.
a. Click the Insert your photo text box.
b. In the Picture Tools Format contextual tab, in the Adjust group, click Change Picture and select Change Picture.
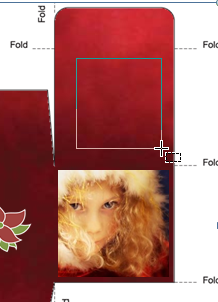
c. In the Insert Picture dialog box, navigate to the location containing the picture, select the desired picture and add click Insert. Similarly, include the picture in the next location.
4. Create a list of all the people you intend to give the gifts. You can do this in Excel.
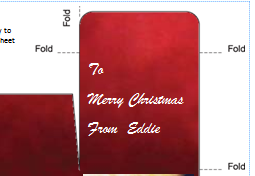
5. On the Home tab, in the Objects group, click Draw Text box and draw a text box on the last section above the image.
6. Type your personalized message in the newly created text box.
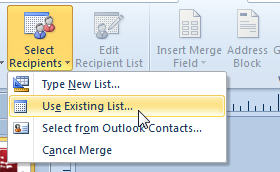
7. On the Mailings tab, in the Start group, click Select Recipients and select your data file containing the names of your guests. You can create a fresh list or use an existing one. For the purpose of this post, I’m using a list created in Excel.
8. In the Select Data Source dialog box, select your data file and click Open.
9. In the Select Table dialog box, select the sheet that contains the data and click OK.
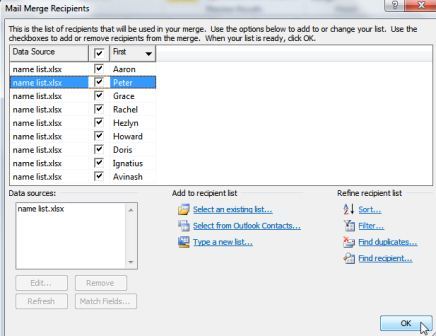
10. In the Mail Merge Recipients dialog box, check if the names are in order and click OK.
11. Click the text box where you want the names to appear.
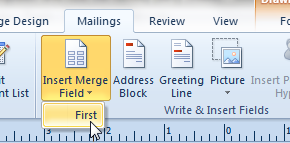
12. On the Mailings tab, in the Write & Insert Fields group, click Insert Merge Field and click First.
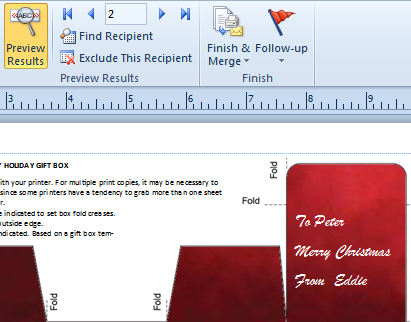
13. In the Preview Results group, click Preview Results and check if the names are in order.
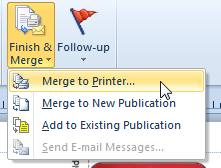
14. In the Finish group, click Finish & Merge and select Merge to Printer to print your boxes.
The various sections of your gift box are now ready to be fit together to form the box. You will be able to create a 2” x 2” x 2” gift box using this template. If you need to create a bigger box, expand the template accordingly.
This particular template also provides instructions to print and fix the various sections to form the gift box.
Don’t forget to check out other gift box templates from Office.com.
It’s the simplest and easiest way to create cool personalized gift boxes for your parties. Hope you have fun creating them. I sure did!!


Leave a Reply