Microsoft Word has a cool feature that lets you hide text in a Word document. One of the most common reasons for hiding text in a document is that you want to print two different versions of the same document with some bits omitted, but don’t want to prepare two separate files for the purpose.
Just like the italic or bold attribute, Word has a text attribute called hidden, which is not visible in the default Ribbon. When the feature is activated, text is not deleted, just suppressed from being shown. If you plan to hide text in a Word document, here’s what you need to do:
How to Hide Text in a Word Document
This activity was performed on a Word 2016 document. It should work relatively the same on Word 2013 and 2010.
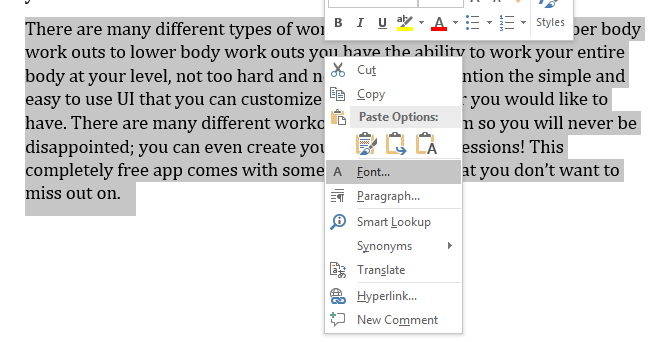
1. Select the text that you want to hide in your document.
2. Right-click the paragraph and select Font.

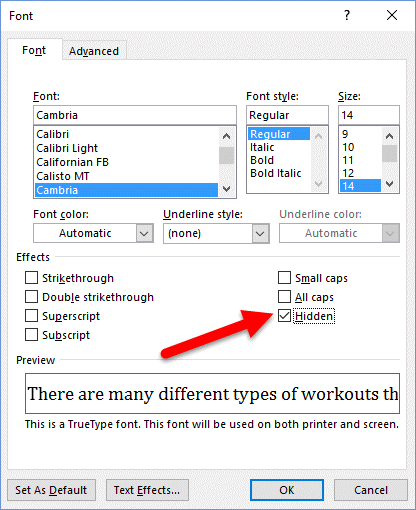
3. The Font dialog box is displayed. In the Effects section, check the Hidden check box and click OK.

When you go back to your document, the text will be hidden from view.
There is one danger in hiding text, which you need to be aware of. When you hide text, it completely goes off the radar. You won’t find any indication of the fact that there is missing text on the document and if you remain a little careless, chances are that when you delete some text from your document, you may end up deleting the hidden text as well, without even realizing it.
How to View Hidden Text in a Document
The best way to safeguard yourself against this is to make sure hidden text is always displayed when you are developing or editing your document.
1. To display the hidden text, select the entire document by clicking Ctrl+A.
2. Right-click the document and select Font.
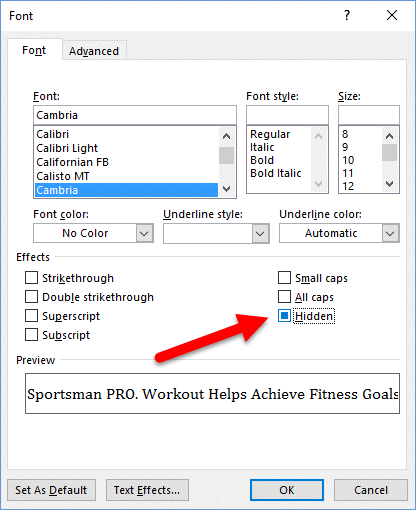
3. In the Font dialog box, notice that the Hidden check box doesn’t have a tick mark as it usually does, but is fully colored. This indicates that some of the text is hidden while other text is visible. Click on it once to change it into a checkmark. This will make all the text in the document hidden.

4. Click the Hidden check box again to remove the tick mark. This will remove the hidden text.
If, after hiding text, you insert some fresh content into your document, precisely where the hidden text was, when you unhide the text, you will find that the hidden text gets pushed down below the newly inserted text.
How to Print Hidden Text in a Word Document
Now that you’ve got the hang of hiding and unhiding text in your document, its time to do some printing. You can do a normal File->Print to print the Word document without the hidden text. To print the entire document including the hidden text:
1. On the document containing hidden text, select the File tab and choose Options.
2. This will display the Options dialog box. Select the Display tab.
3. In the Printing options section, check the Print hidden text check box.
4. Select File->Print.
So that’s how you hide text in a word document and prepare it to print out two different versions of text.
Discover more useful Microsoft Word tips and tutorials in our Archives section.
WOW!! What a gem I have happened to stumble upon. From time to time I get deeply involved in creating “intricate” documents which call for a greater depth of understanding of WORD just how these features can be incorporated into such documents. I am greatly interested and intrigued but what can be achieved by FIELDS and this is something that is no doubt covered somewhere in your archives?