We often have the need to insert a tick mark or a check mark in our Excel and Word documents. But look around the Ribbon interface and you won;t find one simple button or command that can let you insert a tick mark in a click. However, there are a number of workaround solutions that can help you accomplish the task.
How to Insert a Tick Mark in Microsoft Word and Excel
Method 1 – Copy and Paste the Symbol
You can copy a tick mark from anywhere on the web and insert it in your Excel or Word document.
Method 2 – Use Font Shortcuts
You can change your font to either Wingdings 2 or Webdings and then use some keyboard shortcuts to add a tick mark of your choice. In this method, you have a few different styles of tick marks you can choose from.
1. On the Ribbon, in the Font group, click the Font dropdown and select Wingdings 2 or Webdings.
2. Then use the shortcut mentioned in the list below to add a tick style of your choice.
When you choose Wingdings 2 as your font:
| Shortcut | Symbol |
| Shift+O | |
| Shift+P | |
| Shift+Q | |
| Shift+R | |
| Shift+S | |
| Shift+T | |
| Shift+U | |
| Shift+V |
When you choose Webdings as your font:
| Shortcut | Symbol |
| a | |
| r |
Method 3 – Using Symbols
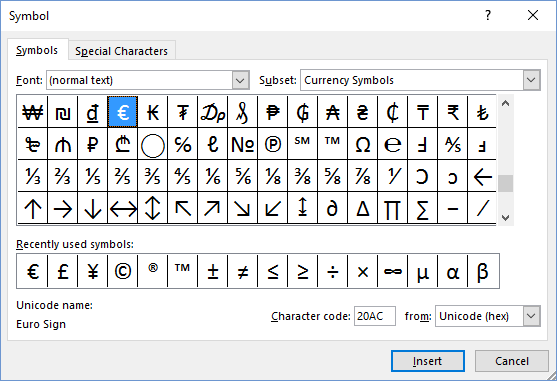
In Excel, you can use symbols to insert a tick mark.
1. Select the Insert tab.
2. In the Symbols group, click Symbol to open the Symbol dialog box.

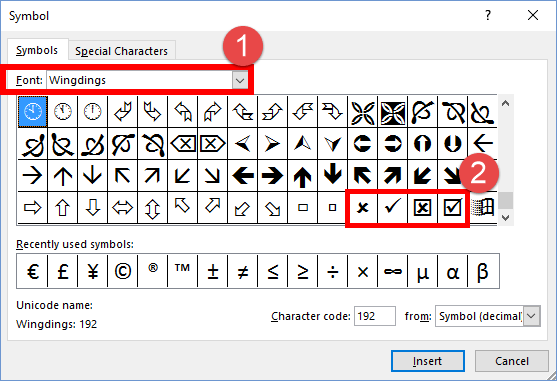
3. In the Font dropdown, select Wingdings. The tick mark will be found at the bottom of the box.

Method 4 – Using Character Code
Another quick way to insert a tick mark in Microsoft Word and Excel is to use the character code of the tick symbol. This method will work only on the numerical keypad rather than the keyboard. You will need to remember the code numbers to insert different types of tick marks.
1. Select the Wingdings font.
2. On the numerical keypad (not the horizontal line of numbers), hold down Alt and enter any one of the following combination of numbers:
Ticks
- ALT + 0252
- ALT + 0254
Crosses
- ALT + 0251
- ALT + 0253
Method 5 – Using AutoCorrect in Word
You can use the AutoCorrect feature in Word to define the text and symbol and then use that definition to add a tick mark in Word.
1. Select the Insert tab.
2. In the Symbol group, click Symbol, and then click More symbols to open the Symbol dialog box.
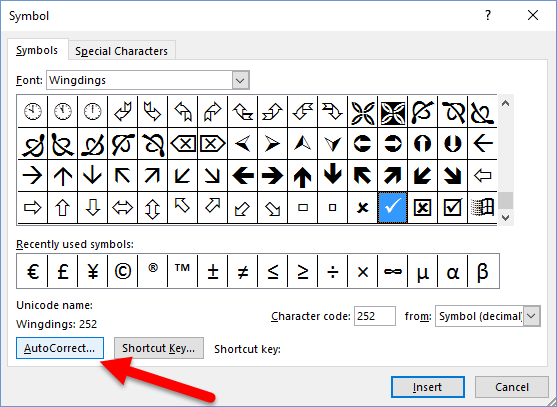
3. In the Symbol dialog box, in the Symbol tab, in the Font box, click Wingdings, and then scroll to the bottom of the list.
4. Select the symbol that you want, and then click AutoCorrect.

5. The AutoCorrect dialog box will now be displayed. In the With box, you will notice that the tick symbol you selected will be displayed.
6. In the Replace box, type a word or phrase that you want to associate with the check mark symbol — for example, I’ll type TM
7. Click Add and then click OK.
The next time you want to insert a tick mark in your documents, type TM or the word you used in the Replace box.
These are the most common and easy ways to insert a tick mark into an Excel or Word document. I have used Microsoft Word and Excel 2016 to perform these steps but it should work on previous versions as well.
Leave a Reply