Windows File Explorer has plenty of useful commands and features that let you perform a number of actions on your files and documents. One such feature is the ability to preview a file such as an image or document. While this feature works on most files, there are times when a preview simply doesn’t work. Mac users have an equivalent feature called Quick Look that lets you preview files without opening them simply by hitting the space bar. This feature is much better when compared to Windows Preview because the preview opens in a new window and offers a more natural way to peek in. Plus, you can peek into contents that are usually not allowed in Windows.
While this feature may not seem like a big deal, you’ll be surprised how natural and easy it is to use Quick Look on Windows. You can get it by downloading and using a cool tool called Seer. Let’s see how you can preview files and folders in Windows using Seer.
How to Preview Files and Folders in Windows
1. Download and install the small, free application called Seer from Sourceforge.
2. Once installed, the app will get added to the system tray in the Notification area. Look for the little blue folder-like icon.
Now when you want to preview any file on your PC, you can simply select the file and hit the Space Bar. Seer lets you preview text files, PDF, media files and more.
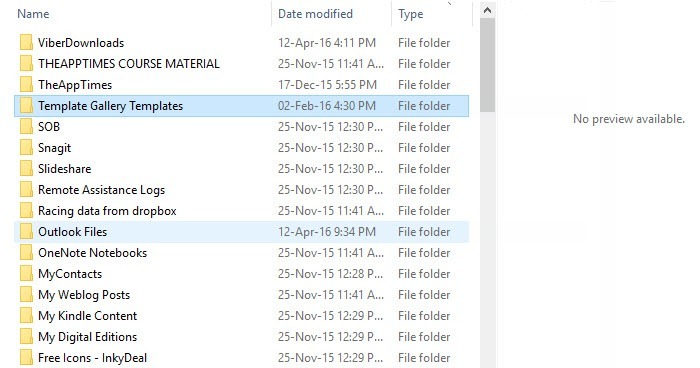
One situation where Seer works like a charm is when you want to preview the contents of a folder. The Windows preview pane will tell you that No Preview is Available.

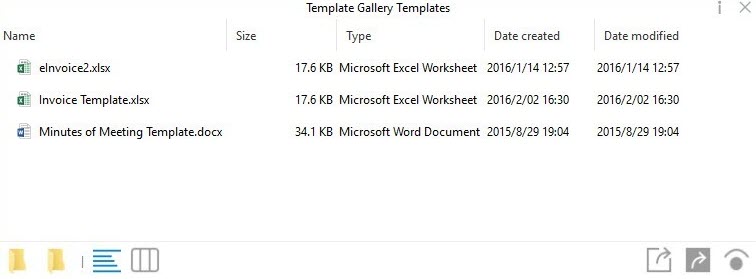
On the other hand, with Seer installed, when you hit the Space bar, you can see the contents of the folder in a new pop up window. If you want to close Seer, all you have to do is hit the Space bar again or click the X button at the top right corner of the window.

Apart from this handy feature, See also includes some extra options that you’d love to use.
Open Selected Item with Default Application – this option is available in the bottom right corner (1st icon from the left) of the Quick Look preview window. Selecting an item in the preview window and hitting this option will open the item in the default application (self explanatory, really!)
Reveal Selected Item in Explorer – this option is available in the bottom right corner (2nd icon from the left) of the Quick Look preview window. Selecting an item in the preview window and hitting this option will open the default location where the file is available on the PC.
View the file properties – The “i” icon in the top-right corner of the preview window lets you view the properties of the file (such as its name, size, creation date, and more) that you selected.
Zoom in and Out and Rotate – If you are previewing an image in Seer, the icons at the bottom of the screen will change. Instead of the Open and Reveal options mentioned above, you will find options to zoom in and out and rotate the image.
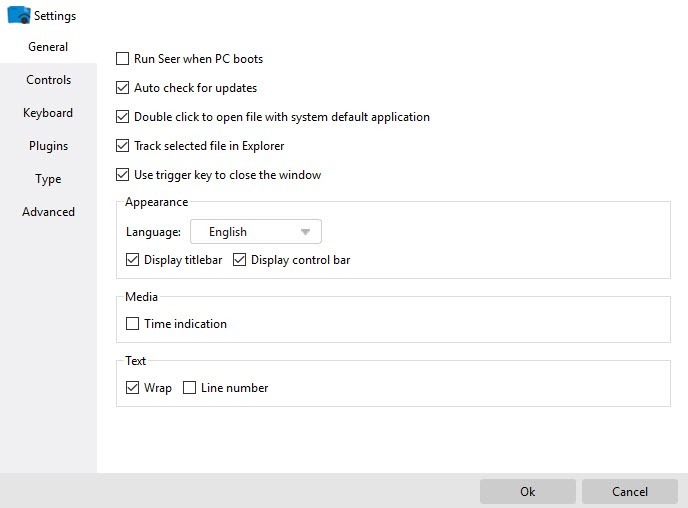
If you want to view the Settings and make further customization changes, you need to right-click the Seer icon in the System tray. The Settings dialog is quite intensive with plenty of options. Most options are enabled by default. If you wish to, you can run through them and change whatever option you want altered. One option you might consider is enabling Seer to run when the PC boots. You can also set keyboard shortcuts for various files.

Another feature worth checking is Plugins. Seer lets you install plugins for specific files that Seer does not support by default. The Type tab displays a list of all the file types that Seer supports. You can also add and remove file types that you want.
In my use of Seer, I found the tool to be extremely helpful in previewing files inside folders, something that I do often by clicking and clicking and clicking. Seer makes peeking in really easy and helps me find stuff a lot more faster than before.
If you want to get this cool feature on your Windows device, be sure to head to Sourceforge and download this pretty cool tool.
Leave a Reply