If you open up any Word document, you will find that the first page or the cover page of the document usually does not have a page number. However, when you set up page numbers, by default the title page will display a page number. You would do well to remove the page number that is displayed on the title page of the Word document. In this Word 2010 tutorial, you will learn how to remove the page number from the title page of a Word document.
In this tutorial, we are not using sections to hide the page number. Instead we will remove the page numbering by simply using a header or footer and tweaking one setting. This will result in the page number starting from the second page of the document.
How to Remove the Page Number from the Title Page of a Word Document
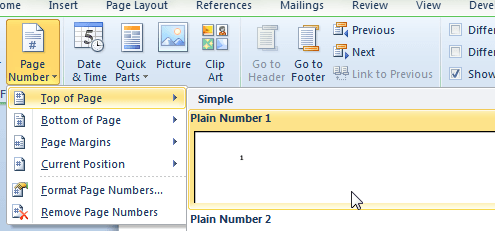
1. Add a page number field if you haven’t already done this.
- Double-click the top of the document to display the Header placeholder.

- In the Header & Footer group, click Page Number, and select an option.

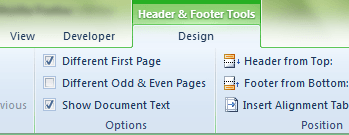
2. In the Options group, check the Different First Page option to remove the page number from the first page.

The page number will now be removed from the first page of the document.
However, if you scroll to the next page, you’ll find that it starts with page number 2. If you want the page number to display as 1 instead of 2, here’s what you need to do.
1. Double-click the Header or Footer section to activate the contextual Header & Footer Tools Design tab.
2. In the Header & Footer group, click Page Number and from the drop-down menu, select Format Page Numbers.
3. The Page Number Format dialog box opens up.
4. In the dialog box, in the Page numbering section, select Start at and enter 0 in the edit box.
5. Click OK.
Now you’ll see that the second page of the Word document starts with the page number 1.
That’s it!
The next time, you work on a Word document and need help with page numbers, you’ll know just what to do.
If you found this tutorial useful, please visit our archives section for more handy Word tips.
Leave a Reply