• Skip to primary navigation
  • Skip to main content
  • Skip to primary sidebar

TheAppTimes

App Reviews, Tutorials, & Gadget News Hub

  • Gadgets
  • How To
  • Apps
  • Software
  • IT
  • Guides
  • Gaming
  • Show Search
Hide Search
Home » How To » How to Setup VIP Mail on iPhone

How to Setup VIP Mail on iPhone

April 5, 2016

You receive a ton of email from your contacts but you rarely have the time to check all of them right away. If you want to be instantly notified about email messages you receive from people who are super important to you, you can make use of the VIP Mail feature in your Mail app to do it. The Mail app lets you set up a Mailbox where all email from people marked as VIP is filtered, making it easier to check just the important mail if you are short of time. If you’re not sure of the process, here’s how to setup VIP mail on iPhone.

How to Setup VIP Mail on iPhone

All contacts marked as VIPs will have a gray star next to their names across all of your mail lists. If you have iCloud enabled, that contact will also be marked VIP across all of your devices.

To set-up your VIP Mailbox:

1. Open your Mail app.

2.  If you’re in one of your mail lists, tap Mailboxes in the upper left corner.

How to Setup VIP Mail on iPhone

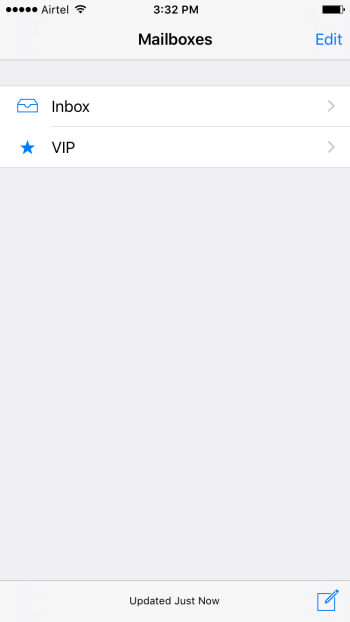
3. In the Mailboxes screen, you’ll see a couple of options; Inbox and below that VIP with a blue star next to it. Tap VIP.

4. In the next screen, tap Add VIP.

Add VIP

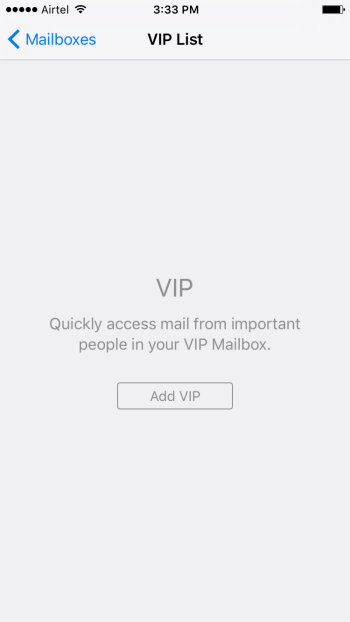
5. You will now be taken to your Contacts. Select the contact you want to add.

6. Your newly added contact will show up in the VIP List screen.

7. Tap Add VIP to continue to include more contacts.

8. To receive custom alerts for VIP mail, tap VIP Alerts in the VIP List screen. (You can find this screen by tapping the i icon on the Mailboxes screen adjacent to VIP.)

ALSO READ:  How to Upload iOS Photos to OneDrive

set custom alerts for VIP Mail

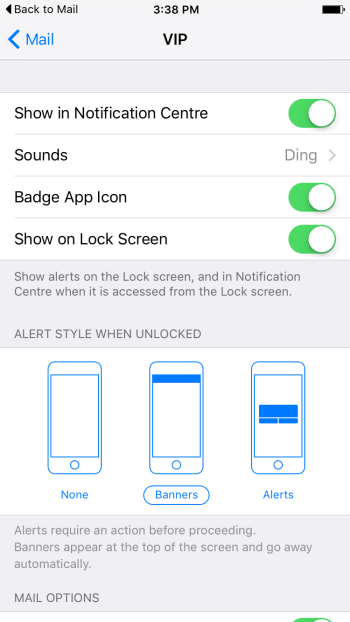
9. Here you will see options enabled to notify you of VIP mail. You can select a different sound alert, alert style, and more.

Note: You can also add a contact or email to VIP by opening an email from them and tapping on their name. Their Sender profile will pop up and you can tap Add to VIP. Adding someone to your VIP list does not remove them from your Inbox mail list.

That’s it! You have just learned how to setup VIP Mail on iPhone. Your mail checking activities should be more organized now.

Check out more iOS tips here.

Tweet34
Share17
WhatsApp
Pin4
Buffer
55 Shares
Tweet34
Share17
WhatsApp
Pin4
Buffer
55 Shares

Filed Under: How To Tagged With: ios how to, ios tips

You May Also Like

How to Lock Your Google Account from Your iPhone - TATFI
How to Lock Your Google Account from Your iPhone Using Google Smart Lock
How to Control Your Apple Watch Using Hand Gestures
How to Use AssistiveTouch Gestures to Control Your Apple Watch
How to Sort Notes by Title or Date Created on iPhone - TATFI
How to Sort Notes by Title or Date Created on iPhone

About Adeline Gear

Adeline is a tech enthusiast who loves exploring the latest tools and applications in the marketplace. She also loves her Android and spends time reviewing apps and playing games when she has the time.

Reader Interactions

Leave a Reply Cancel reply

Your email address will not be published. Required fields are marked *

This site uses Akismet to reduce spam. Learn how your comment data is processed.

Primary Sidebar

Hottest New Gadgets!

iPhone 15 vs iPhone 15 Pro - TAT

iPhone 15 vs iPhone 15 Pro: Which One Should You Choose?

iPhone 15 Pro- TAT

Performance Meets Elegance: Meet the iPhone 15 Pro

iPhone 15- TAT

iPhone 15 Unveiled: A Closer Look at Apple’s Latest Flagship

Lenovo Legion Go - TAT

Lenovo Legion Go: A Powerful Windows Gaming Handheld Launching in Oct 2023

Best Accessories for the Galaxy Z Fold 5 - TAT

The Best Accessories for the Galaxy Z Fold 5

Popular Tags

android android apps android games android how to apple casino games chrome extensions excel excel how to facebook fitness wearable gadgets gaming gmail google ios apps ios games ios how to ios tips ipad iphone kids apps learn excel management microsoft new releases outlook how to photo apps powerpoint how to productivity Samsung security smartphone smartphones smartwatches software tablet tablets technology twitter web browsers windows 10 word how to xbox youtube

Disclosure

TheAppTimes is a participant in the Amazon Services LLC Associates Program, an affiliate advertising program designed to provide a means for us to earn fees by linking to Amazon.com and affiliated sites.
Personalize Your Hardware with Razer Skins - TAT

Personalize and Protect Your Gaming Hardware with these Stylish Razer Skins

Best Controllers for Xbox Cloud Gaming - TAT

Best Controllers for Xbox Cloud Gaming

Starfield - TAT

Starfield: Get Ready to Experience a New Frontier in Gaming

Razer Cobra Pro - TAT

Razer Cobra Pro: A Great Gaming Mouse for Competitive Gamers

Best gaming monitors 2023 - TAT

The Best Gaming Monitors for a Truly Immersive Experience

Hot on Amazon

TheAppTimes © 2023 // Runs on StudioPress

  • About
  • Contact
  • Privacy Policy
  • Template Gallery