It is a good practice to shut down your PC every night when it is not in use. But, it may happen that you forget to do so every now and again. In this tutorial, we’ll show you how to shut down your PC automatically at the end of the day using the Task Scheduler.
If you happen to find shutting down your PC a chore, you can put your PC to sleep. But if you prefer to shut it down and want to make sure it gets shut even if you forget to do so, there’s a way to do it. You simply need to set up a rule in the Task Scheduler to automatically shut down your PC at night, provided it is not in use. Here’s how to do it on Windows 10.
How to Shut Down Your PC Automatically at the End of the Day
1. On the taskbar, click the Windows Search icon and type Task scheduler.
2. From the results, select the desktop app Task Scheduler.
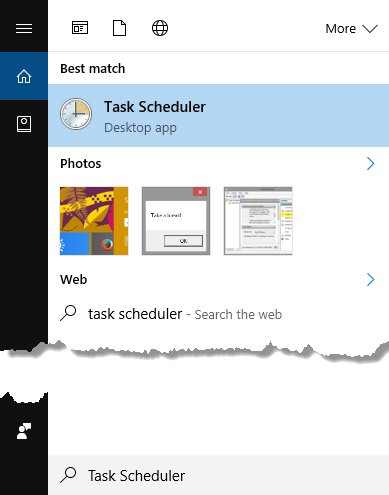
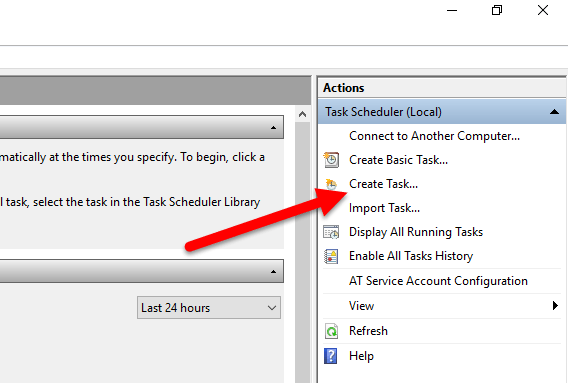
3. The Task Scheduler window will open up. In the Actions pane, click Create Task.
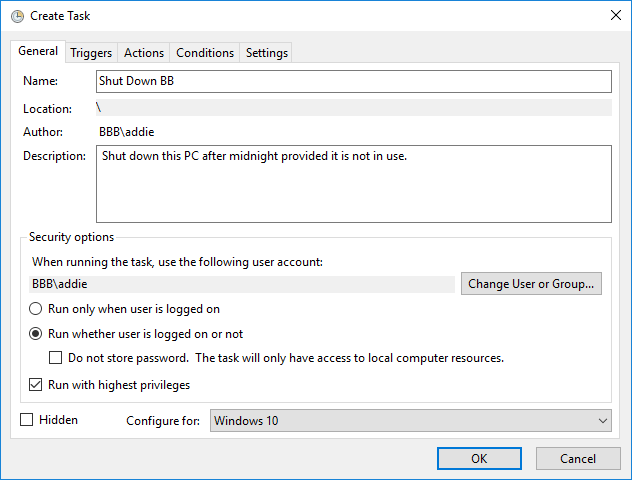
4. In the Create Task window, on the General tab, in the Name field, give your name a task.
5. In the Description field, enter a description.
6. Select the option, Run whether user is logged on or not.
7. Select the option, Run with highest privileges.
8. Click the Configure for drop-down and select Windows 10 (or your version of Windows if it is different.)
9. Next, select the Triggers tab.
10. Click New to create a new trigger.
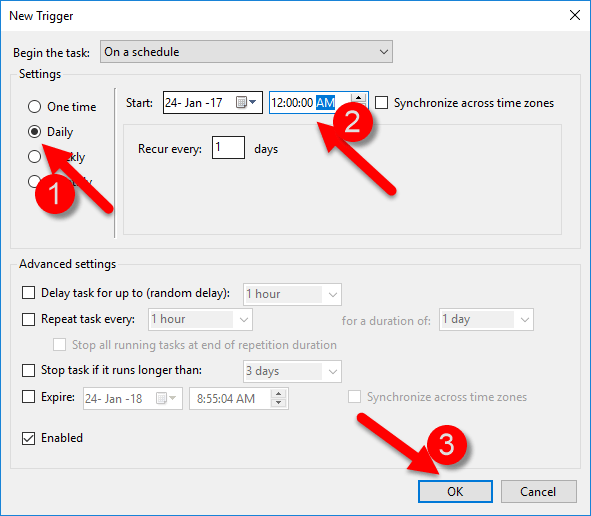
11. The New Trigger window will open up. In the Begin the task dropdown, ensure that On a schedule is selected.
12. Set up the shutdown schedule according to your requirements. We’ll choose to shut down the PC daily after midnight. You can choose a schedule that’s suitable for you. When you are done, click OK.
13. Next, select the Actions tab. Click New to create a new action.
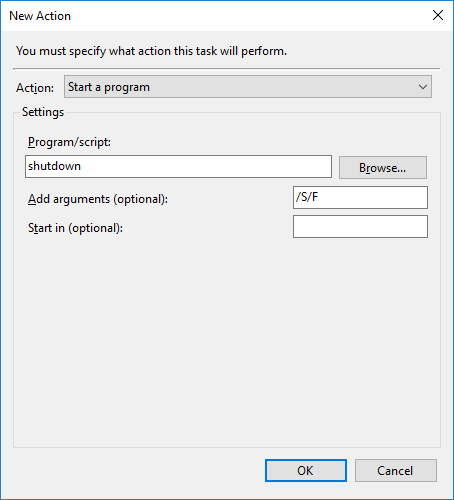
14. The New Action window will open up. Ensure that the Action drop-down menu, displays Start a program. In the Program/script field, enter shutdown
15. In the Add arguments (optional) text box, type a basic shutdown command /S. If you want the scheduler to close any open programs or running applications before shutting down, add the command /S /F. Click OK.
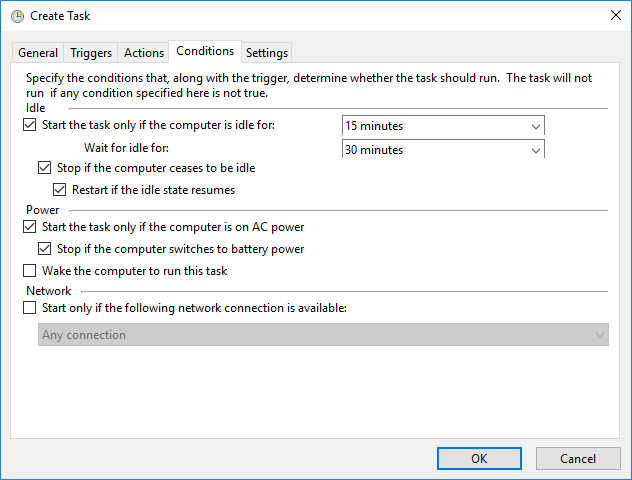
16. Next, select Conditions tab. Select the Start the task only if the computer is idle for option and set a timing. I’m setting an idle time of 15 minutes after midnight with a wait time of 30 minutes. The shutdown will be triggered only when these conditions are fulfilled after midnight.
17. Select the Stop if the computer ceases to be idle option. This will stop the rule from running, if you happen to start using the PC after midnight, before the rule sets in.
18. Select the Restart if the idle state resumes option. This will get the Task Scheduler to resume counting the idle time again when you stop using your PC.
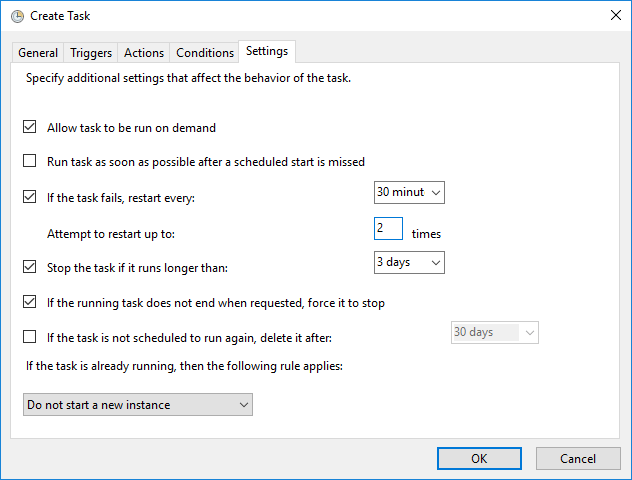
19. Next, select the Settings tab. Here, you can set the time for the task to run again it fails to run successfully. This will shut down your PC if you are using it longer than expected. You can set a restart that is convenient for you. I’m going for 30 minutes and restart up to 2 times. Select the If the task fails, restart every option and select 30 minutes . In the Attempt to restart up to field, enter 2 times. Click OK.
20. Next, a Task Scheduler pop-up will ask you to enter your user account password.
That’s it! You can now exit Task Scheduler.
Your PC should shut down automatically at the time you scheduled it to shut down based on the rules you set.
If you found this tutorial useful, be sure to check out our other tips and how-tos in the Archives.
Leave a Reply