The Windows 10 Anniversary Update has some great improvements that makes the operating system a lot more intuitive than before. One of the coolest things that you can now do at the switch of a button is turn your PC into a wireless hotspot. This will make it possible for you to share the PC’s wired or wireless Internet connection with any other wireless devices you have. If you’re not sure how to get started, here are the quick steps on how to turn your Windows PC into a WiFi Hotspot.
How to Turn Your Windows PC into a WiFi Hotspot
If you still haven’t updated your Windows 10 PC with the Anniversary Update, go to Settings-> Update & security and install the latest updates. Then:
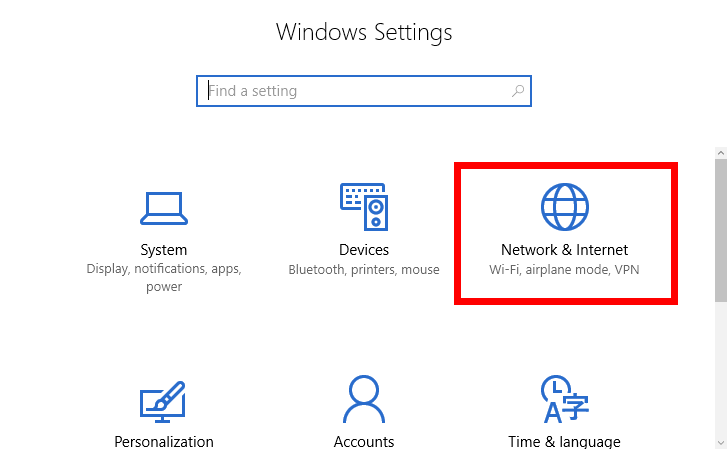
1. Go to the Settings screen or use the keyboard shortcut of Win+I to open the Settings screen.
2. Click Network & Internet.

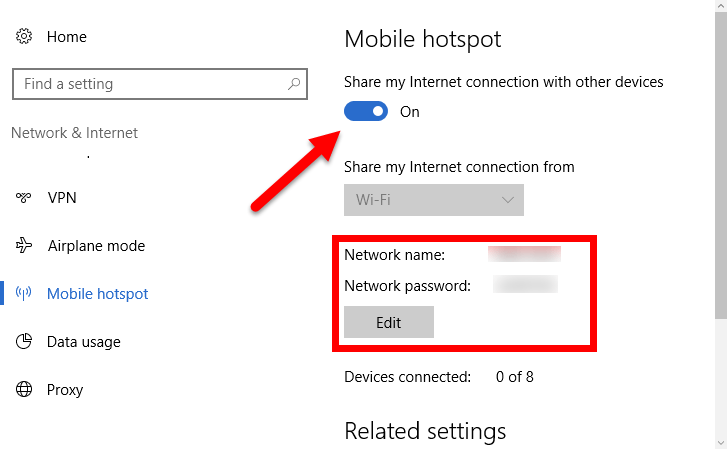
3. On the Network & Internet screen, on the left pane, click Mobile hotspot.
4. On the right pane, turn on Share my Internet connection with other devices.

Windows will offer a network name and password by default. If you want, you can change this to something else by clicking the Edit button.
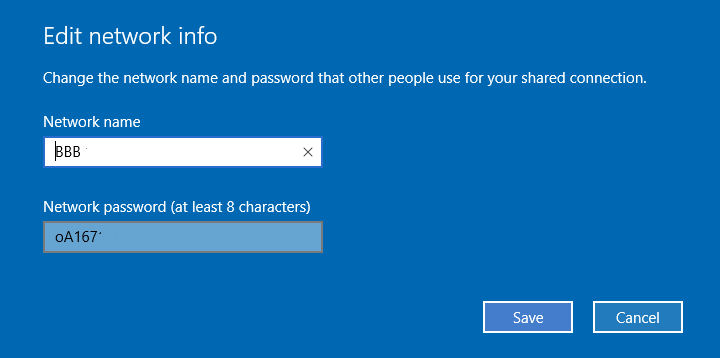
5. In the Edit network info pop up screen, type a network name and password you want to use and then click Save.

That’s it! In just a few quick clicks, you turned your Windows PC into a WiFi hotspot.
The Mobile Hotspot screen also gives you the option to allow another device to turn on mobile hotspot. If you can pair the other device and your PC via Bluetooth, you can enable the Turn on remotely option as well.
So the next time you hear someone tell you that turning your PC into a mobile hotspot is a complex job, just show them how quickly this can be done.
If you found this tutorial useful, feel free to check out our other tutorials in our Archives Section.
Leave a Reply