No tech writer wants to seem behind the curve, but I’ll admit that I had no idea that Google’s new Research tool was coming until it appeared on the right side of my Docs window. I should have known the New Google Docs Research Tool was coming, not simply because I watch Google’s every move like a demented stalker, but mainly because it’s the single most helpful thing that Google has done for writers since the tenth anniversary of Blogger.
Back when Firefox was a hip new browser alternative to the Big Bad IE, a tiny little feature appeared that allowed you to highlight a word or phrase and right-click to do a search on those terms. Sure, little features like that don’t seem quite so revolutionary now (tabbed browsing was a big deal then too), but at the time it was extraordinarily helpful.
How to Use the New Google Docs Research Tool
The Research tool takes that idea and embeds it within Docs, while adding extra features to narrow down your results to suit your specific research needs.
- Once you’ve selected the words that you want to research, right-clicking and selecting “Research” is the most intuitive way to get there, but those who love keyboard shortcuts can also use Ctrl + Alt + R (or Cmd + Opt + R on Mac). Alternately, you can go to the drop-down Tool menu at the top of the screen and select “Research.”
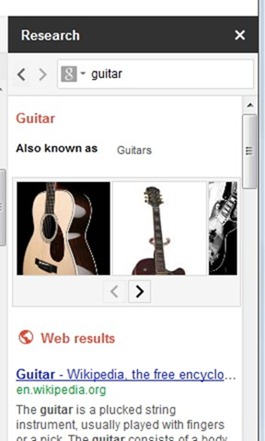
- The Research window will open up, taking up about 1/5th of the right side of your browser. If it feels cramped, clicking on the “Web results” link at the top of the window will open a new page for the results.
- You can narrow down your results by clicking on the drop down menu in the search field (that little Google “g” icon with the arrow next to it). The default is “Everything,” but you can select “Images” and “Quotes” instead. The icon in the search field will change to reflect your choice (a little camera for Images, and pair of quotes for Quotes) and stay that way until you choose otherwise.
- The forward and backward arrows, to the left of the search field, work exactly like the same functions in a browser.
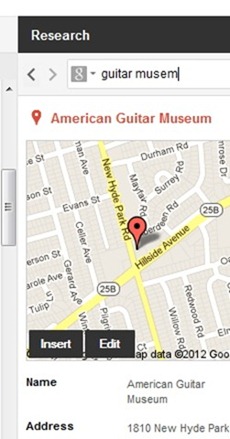
- If your search term involves a location, you’ll be happy to know that you can also include Places. The Google Maps result will appear at the top of your Research window, and you can either click on the Insert button or drag-and-drop the map into your document. If the location isn’t quite where you want it, click on “Edit” and the familiar Google Maps movement and zoom tools will be available; including Street View. When you have the location just the way you want it, click “Done” to get the “Insert” and drag-and-drop options back.
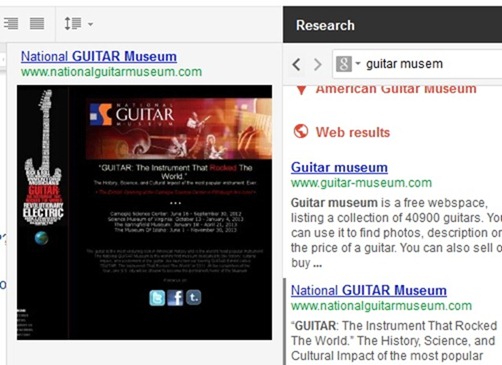
- You can preview any results without leaving the page. For images, all you have to do is hover over the thumbnail for a larger view. For web pages, hovering over the individual result will give you a “Preview” button to click. Somewhat annoyingly, this preview will obscure some of your text until you get rid of it (by clicking “Preview” again, or by hitting the “Close” button at the bottom of the preview pane).
- To the right of the “Preview” button, you’ll also see two other options: “Add Link” and “Cite.” “Insert Link” does exactly what it says; wherever your cursor is in the document window, you’ll get a nice little hyperlink. If you have no text selected, this will show up exactly as written in the “headline” of the specific search result. If you do have text selected, it will TRY to use that text, but sometimes it gets confused and selects more or fewer words than you’d originally highlighted, depending on the length of the link. Expect Google to fix that bug, sooner or later.
- Selecting “Cite” is an extremely useful tool for those of us who need to use footnotes and/or bibliographies (or those who can’t embed hyperlinks for some reason). Clicking on “Cite” will instantly give you a perfectly-formatted citation at the end of the document, as well as a superscript number to reference from the text (make sure your cursor is where you want it to go, of course). The first time you Cite, you’ll get a separator before the initial citation; this will automatically scale to include any further citations on that page.
- Similarly, if you use the Quote search, clicking “Insert quote” will add your quote at the cursor position, referencing the author AND providing a citation at the bottom of the page. Not so great if you’re supposed to be learning how to do proper citations, but a supremely awesome genius timesaver for the rest of us.
- For images, you can simply drag and drop the image from the thumbnail results or preview pane and place it wherever you want in your document. Image previews also have two additional links at the bottom: the URL of the image itself, and the URL of the webpage that it comes from.
- Remember where your cursor is! I had a few confused moments in which I was still typing into the search field instead of the sentence that I thought I was writing in the main document. No doubt you’re less scatterbrained than I am.
That’s everything that you’ll ever need to know about Google’s Research tool; at least until the next update. It’s hard to imagine what Google might be able to add to that little box, but then again it’s hard to believe they’ve packed in so many useful features already. I won’t get too carried away with the praise — after all, you could do something similar within Microsoft Word a few versions ago, but as a blogger who uses Docs as his main writing platform, it really will make a big difference in how I research and compose my articles.
Author Bio
This is a guest post by Greg who does marketing for CableTV.com. You can check out his profile and see links to some of his best work at http://www.cabletv.com/authors/greg-buckskin.


Leave a Reply