Sometimes, you may find the perfect picture to add to your presentation, but with just one problem; an unpleasant background. Well, PowerPoint 2010 has a new tool – Background Remover, which lets you remove the background of an image with ease. In this tutorial, you will learn how to remove a picture background in PowerPoint 2010.
How to Remove a Picture Background in PowerPoint 2010
1. Click the picture that you want to have the background removed from.
2. Select the Picture Tools Format contextual tab.
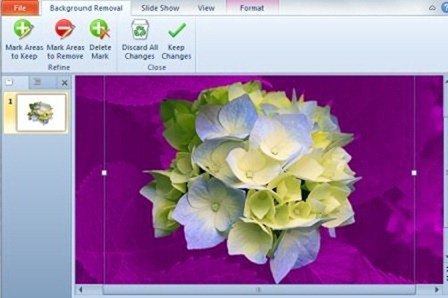
3. In the Background group, click the Background Removal button.

4. Observe that marquee lines are displayed on the picture. Click and drag the line so that it contains the portion of the picture that you want to retain. The Slides tab displays what the picture will look like with the background removed. Adjust the marquee lines until you get the best results.
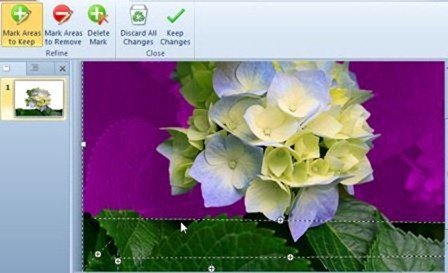
5. If necessary, click Mark Areas to Keep and draw lines or click areas across the background that you want to retain. Note that you should draw lines in the dark pink background to retain parts of that background.

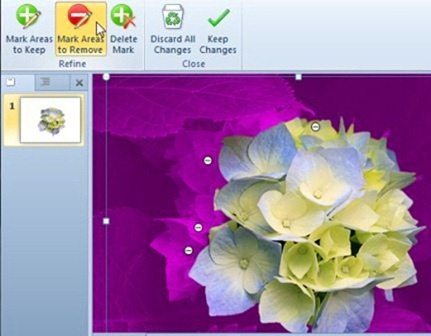
6. If necessary, click Mark Areas to Remove and draw lines or click the areas across the picture to remove the background you don’t want displayed. Preview the change and adjust as you see fit. Use the Delete Mark button to delete any areas you marked.

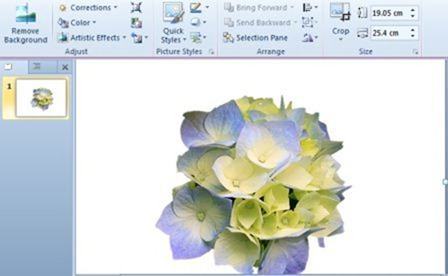
7. On the Background Removal tab, click Keep Changes to retain the changes.
Here’s how the picture will look now.

In this tutorial, you examined the various options that will help you remove a picture background. This will help you remove annoying backgrounds and improve the quality of the pictures you use in your presentations.
If you found this tutorial useful, be sure to visit the Archives for more useful PowerPoint tutorials and tips.
Leave a Reply