Every business maintains an account of time spent on services rendered or received and keeps track of the quantity of goods purchased or sold using invoices. In this post I will be reviewing an online invoicing and billing web app known as Invoicera that lets you create and manage invoices online.
Invoicera boasts of an impressive list of features including Google add on integration, multi-language and currency support, time and expense tracking and more. Invoicera has different pricing plans, and depending on your business you can choose from a free plan, to one that priced between $10 and $ 50 a month.
Features of Invoicera
1. Create customized invoices
2. Create recurring invoices
3. Manage and schedule invoices
4. Add project tasks and track time spent on each tasks
5. Manage and track expenses
6. Organize and manage client information
7. Create interactive reports
8. Create additional accounts for other members of you team to manage clients
9. Support for multi-currencies, multi-languages, and multi-payments
Getting Started with Invoicera
Before you start creating your invoices/estimates, you need to fill in some basic information related to your business, such as product or service details, client info, and so on. The simple forms in Invoicera let you add this information with ease. You can use the menu to navigate to the various sections, or select a quick link from the dashboard to easily get started. And if you need help, get help from a Live Chat support executive. So here’s a look at how you get quickly started with the basic details.
Add Clients
The Add Client form lets you add your client’s details such as business email, business and client country, currency and payment terms, phone number, shipping and business address, and additional contact information if estimates or invoices need to be sent to more than one contact. Additionally, you can customize the template fields and set a language for your forms. You can also assign the client to a staff in your company for better client management. You can enter these details manually or by importing them from an Excel spreadsheet. (not more than 500 at a time) You can also set the currency for each client if it differs from your base currency at specific rates you choose or let Invoicera’s online currency converter do the math for you.
Add Products/ Services
The Items menu lets you add and manage product and services. You can enter product and service details such as name, quantity, description, tax rates and unit cost manually or import them from an Excel spread sheet. The price of the product or cost of the service will get automatically converted into the currency that is set for the client.
Input Tax Rates and Charges
The Tax/Charges/Late Fee option in the Settings drop-down menu lets you add tax details such as the tax name, tax caption and tax percentage. The additional tabs in the form enable you to include additional charges to estimates and invoices as a percentage or as a fixed value.
Customize Forms
You can set the general customization options for your forms from the General Preferences option in the Settings drop-down menu. Options include modifying the date format and time zone, customizing invoices and estimates settings, choosing predesigned templates such as Classic, Imperial, Business Elegance, Creative, or Corporate Essence. You can also customize an existing template, create your own HTML template, edit mail settings, customize label names, and backup data to your local system using the tabs in the General Preferences page.
Set Payment Preferences
The payment preferences are accessible from the Settings drop-down menu. You can choose the online or offline mode of payment and choose from 16 payment gateways including PayPal, Money Booker, Google Checkout and more. Invoicera additionally supports recurring billing on PayPal.
Inputting the basic details in Invoicera will help you to quickly create invoices and estimates for each of your clients.
How to Create and Manage Invoices Online Using Invoicera
1. Decide on a pricing plan and click the Sign Up button.
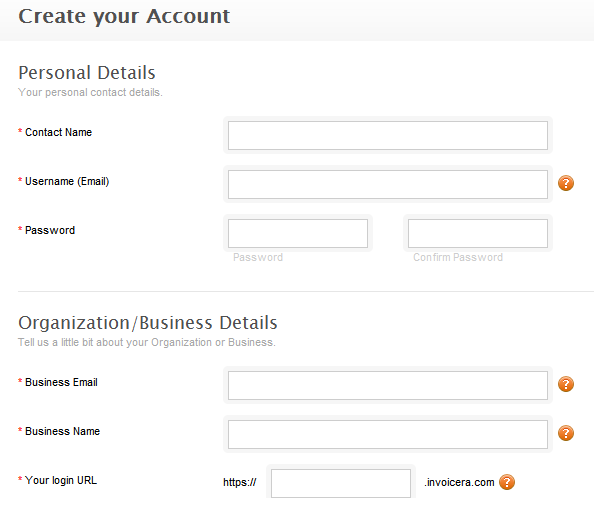
2. Enter your business account details. Enter a unique name for the login URL. This URL will be used to access your Invoicera account and cannot be modified or changed.
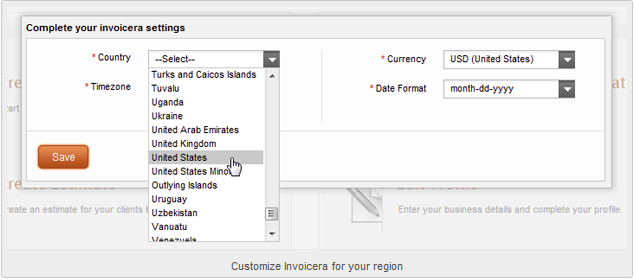
3. Apply regional settings to your Invoicera settings and click Save to complete the setup and start invoicing.
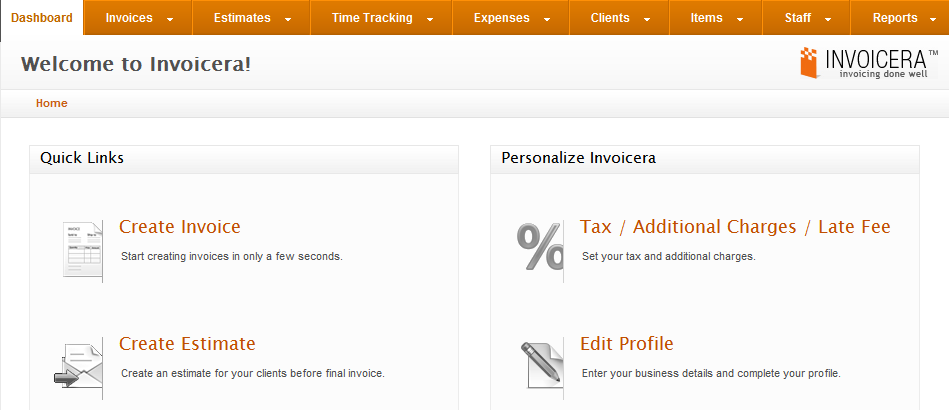
4. When you login to your account, the dashboard will be displayed. The menu bar contains the options to start creating and managing your billings.
Now that you’ve got started with Invoicera, you can start inputting your business details. If you have trouble setting up your business in Invoicera, get live support from the Invoicera chat team using the Live Chat link.
If you are running a small business, Invoicera is definitely a great app to help you manage and maintain your billing needs. Give it a try and let us know your thoughts.


Thanks Eddie for this great review of Invoicera.