If you have an Android smartphone running stock Android, chances are you don’t have a number row at the top of the keyboard. This can be quite annoying as you often type in numbers when composing messages or entering passwords. You can now add a number row to Android keyboard thanks to the latest Google app update. In the update Google has also renamed its keyboard GBoard. If you still haven’t enabled the number row on your Android keyboard, here’s how to do it.
How to Add a Number Row to Android Keyboard
Make sure you have the latest version of the keyboard on your smartphone. If not, just head over to the Play Store and update the keyboard. Once you have the latest version installed, do the following.
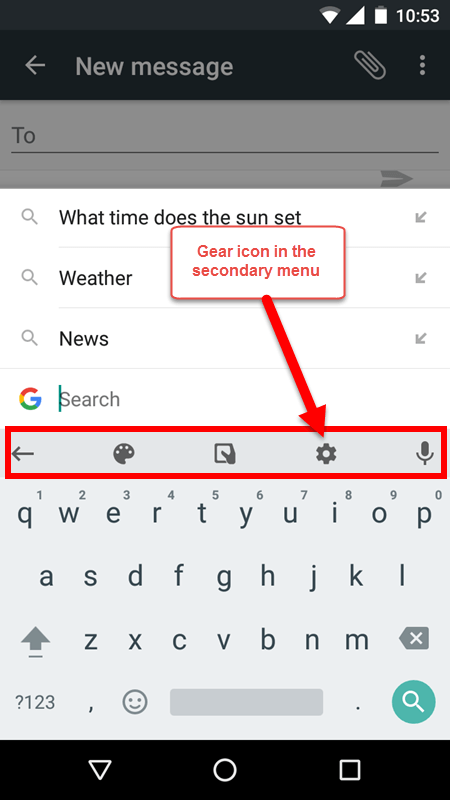
1. Open the Messages app to start compose a message. You can also open any other app that lets you type some text. This will activate the keyboard. You’ll see that the keyboard is missing the number row.
2. Tap the G icon at the top of the keyboard to bring up the secondary menu.

3. In the secondary menu, tap the Gear icon to open up the GBoard settings.

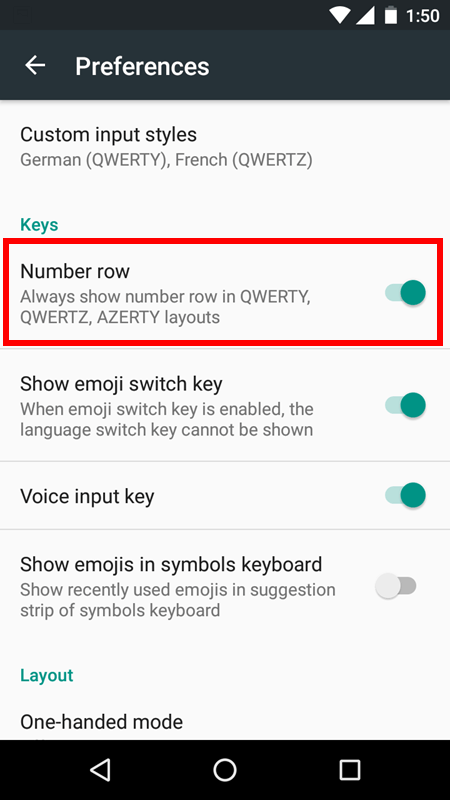
4. In the GBoard keyboard settings screen, tap Preferences.

5. In the Number row field, toggle the button to turn it on.

6. This will always show the number row in QWERTY, QWERTZ and AZERTY layouts.
That’s it! You just added the number row to the Android keyboard. When you head back to the compose screen and activate the keyboard, you will see the number row atop the keyboard.
If you feel that the number row is taking up too much space on the screen and want to disable it, just go ahead and turn off the Number row option in the GBoard settings and you’ll revert to the original layout.
If you found this tip useful, be sure to visit our Android How To archives for more Android tips and tricks.
Leave a Reply