By default, Microsoft hides certain important application files and folders in Windows to prevent users from accidentally deleting them. However, there are times when you need to access these hidden files and folders, such as when you are trouble shooting or modifying certain files. Whatever the reason, if you cannot find the files and folders needed for the job, you can get your PC to show hidden files and folders in just a few steps.
We previously discussed how to display hidden files and folders in Windows 8 PC and Android, and you can click here to access the steps. If you want to know how to display hidden files and folders in Windows 10, here are the steps.
How to Display Hidden Files and Folders in Windows 10
1. From the Start menu, launch the Settings app.
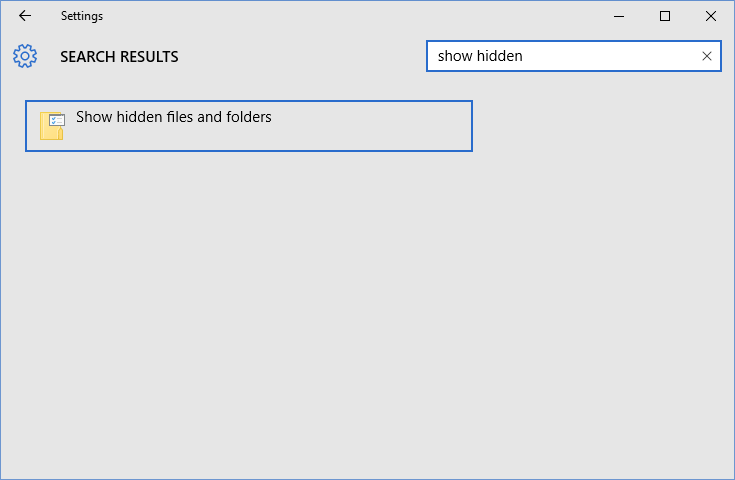
2. In the Search field at the top right corner of the screen, type show hidden files and folders. Autosuggestion will automatically pull up this result for you and you can select it.

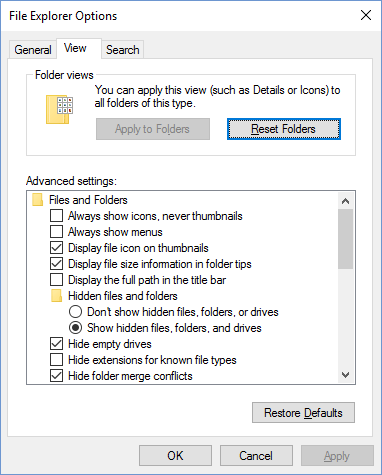
3. This will open up the File Explorer Options dialog box with the View tab active. In the Advanced settings section, select Show hidden files, folders, and drives and click OK.

Alternately, in the Windows 10 Search box, type hidden files and folders and select the search result from the Settings section. This will again display the File Explorer Options dialog box from where you can activate the option.
How to Prevent Display of Hidden Files and Folders in Certain Directories
You can use File Explorer to unhide or prevent the display of these hidden files and folders in certain directories. In File Explorer, on the Ribbon, select the View tab and in the Show/hide group, check Hidden items.

So the next time, you need to find certain files or folders that remain hidden from view, use these quick and easy steps to display hidden files and folders and then proceed to complete the troubleshooting or other activity you set out to do.
Discover more cool Windows 10 tips and tutorials in our Archives section over here.
Leave a Reply