Entering repeated chunks of text such as an address, logo or a pricing table in a Word document is a chore. Luckily word offers the AutoText feature that lets you store blocks of text and pull it up when you want to reuse it later. The AutoText feature has now become part of a bigger feature called Quick Parts that lets you not only add text to a document but also document properties such as the title and author of the document, and fields such as dates and page numbers.
Quick Parts and AutoText features are also called Building Blocks and apart from the predefined building block features that are readily available in Word, you can also create and save your own building blocks for reuse later.
In this post, we’ll show you how to create an AutoText block and save it so that you can insert those blocks of text in any Microsoft Word document later. For the purpose of this tutorial, I’m using Microsoft Word 2016.
How to Create an AutoText Entry
1. Open Word and type out the chunks of content that you want to save as an AutoText entry.
2. Now select the content and select the Insert tab.
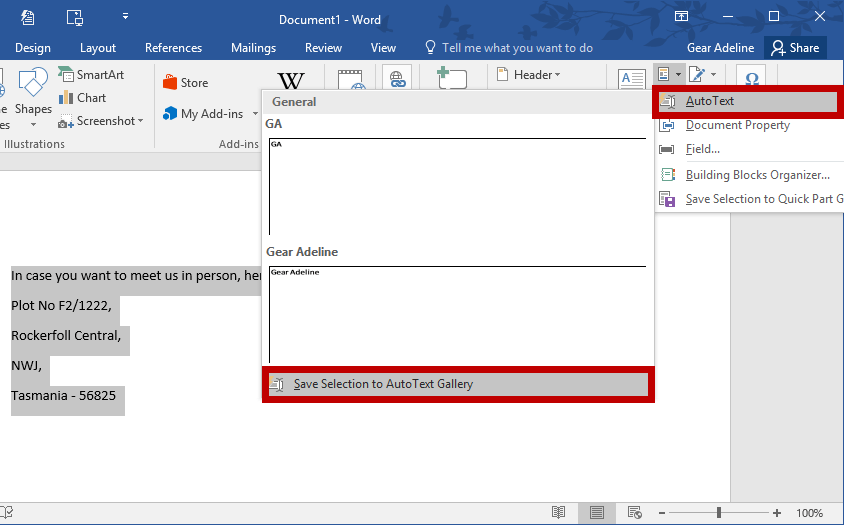
3. When the Ribbon displays the groups in the Insert tab, head over to the Text group, click Quick Parts, hover over AutoText and then click Save Selection to Auto Text Gallery.
4. The Create New Building Block dialog box is now displayed. In the Name text box, type a name for the entry. Keep this name unique so that its easy to quickly add it to the document. If you have many names starting with a similar word, you’ll have to type out a few words to get it to show up.
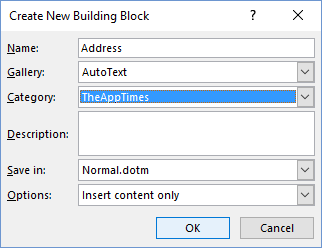
5. From the Category drop-down click Create New Category to create a custom category to enter this AutoText entry.
6. The Options drop-down lets you save the building block in 3 formats.
- Insert content only – Use this when you want to insert a small piece of text such as a name where the cursor is available.
- Insert content in its own paragraph – Use this when you want to insert the content as a separate new paragraph.
- Insert content in its own page – Use this option to insert content on a page such as when you are creating standard cover pages.
7. For this tutorial, we are adding an address so the default ‘Insert content only’ option should be fine.
8. Notice that the file is saved in Normal.dot format. Click OK to close the dialog.
9. Close the Word document.
Insert the AutoText Block in a New Document
Now let’s insert the newly created AutoText entry into another document.
1. Open the document where you want to insert the AutoText.
2. Select the Insert tab.
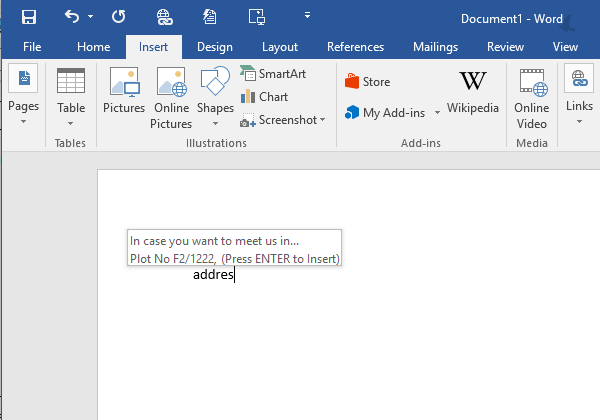
3. In the text group, hover the mouse pointer over AutoText and select the newly created AutoText block. Alternately, you can simply start typing the name of the AutoText entry and a pop-up will appear asking you to select it. In that case, press Enter or hit the F3 key to insert the AutoText.
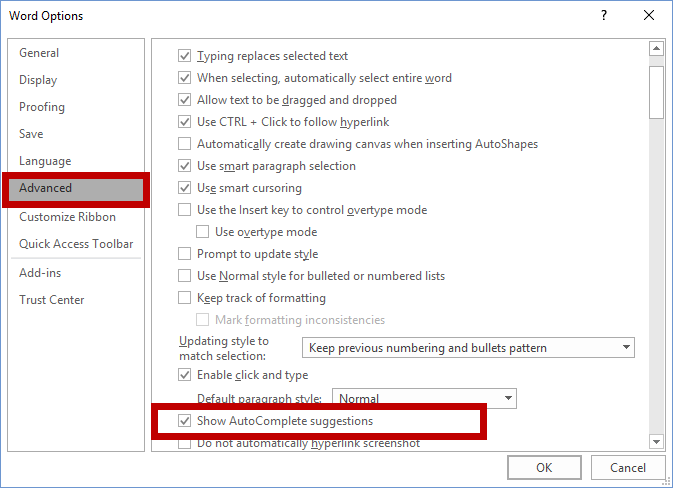
If you don’t see the pop-up box when you enter the AutoText name, the Show AutoComplete Suggestions may be turned off and you’ll need to activate it. To do that:
1. Open a Word document and select the File tab and choose Options.
2. In the Word Options dialog, select the Advanced tab.
3. In the Editing Options section, check the Show AutoComplete suggestions check box.
4. Close the dialog box.
That’s it! you should now be able to see the AutoText entry when you type the name.
Quick Tip: If you use a lot of the AutoText feature, you can add the AutoText command on the Quick Access toolbar.
How to Edit an AutoText Entry
If for any reason, you want to make changes to the block of content you saved in AutoText, you can do it quite easily.
1. Enter the new text you want to save.
2. Select the entry and on the Insert tab, in the Text group, hover over AutoText.
3. Click Save Selection to AutoText Gallery.
4. In the Create New Building Box dialog, in the Name dialog box, enter the same name that you named the previous entry.
5. Click OK.
6. In the confirmation box, click Yes to replace the previous entry with the new one.
Changing the data in the AutoText block will only show up in the new documents you inserted. It won’t be update itself in older documents.
How to Edit Properties of an AutoText Block
AutoText entries contain properties such as category, template information and so on. If need be, you can make changes to it as well. To do this:
1. Open the Word document.
2. Select the Insert tab and in the Text group, click the Quick Parts button.
3. From the dropdown menu, select Building Blocks Organizer.
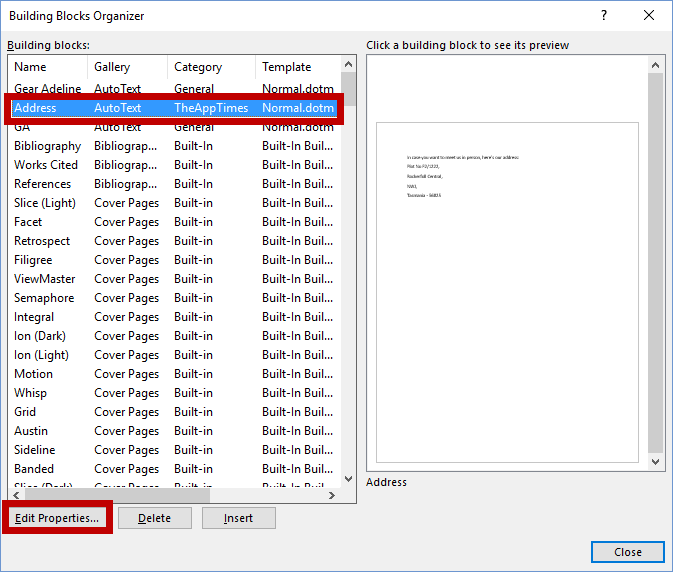
4. In the Building Blocks Organizer dialog box, select the AutoText entry you want to edit. You will be able to see a preview of the AutoText on the right pane.
5. Click the Edit Properties button.
6. In the Modify building Block dialog box, you can make changes to the category and options. For the sake of this tutorial, we’ll select the Insert content in its own paragraph option and click Next. So the next time we insert the AutoText block, it will display as a new paragraph irrespective of where the cursor is.
7. Click OK.
8. In the confirmation text box, click Yes to update the changes and close the dialog.
How to Delete an AutoText Block
If you no longer need an AutoText block, you can delete it. To do this:
1. Open the Word document.
2. Select the Insert tab and in the Text group, click the Quick Parts button.
3. From the dropdown menu, select Building Blocks Organizer.
4. In the Building Blocks Organizer dialog box, select the AutoText entry you want to delete and click Delete.
5. In the confirmation box that appears, click Yes to confirm the deletion.
6. Close the Building Blocks Organizer dialog box.
If you haven’t used AutoText in Word, follow this guide to simplify your documentation work.
Leave a Reply