If you own a Windows PC and spend a lot of time working on it, chances are you’ve signed up to multiple cloud accounts such as Dropbox, Google Drive and OneDrive. While accessing your work data using these cloud services is great, you may not particularly like searching for particular information across these different services in the different folders on your PC. An easier way to do it is to create a new folder in your Library and include all your Cloud folders within it so that your search across the cloud will be confined to just the one folder. The steps to manage multiple cloud folders in Windows was performed on a PC running Windows 10, but this should also work on a PC running Windows 8.1.
How to Manage Multiple Cloud Folders in Windows 10
1. On your Windows 10 PC, open File Explorer.
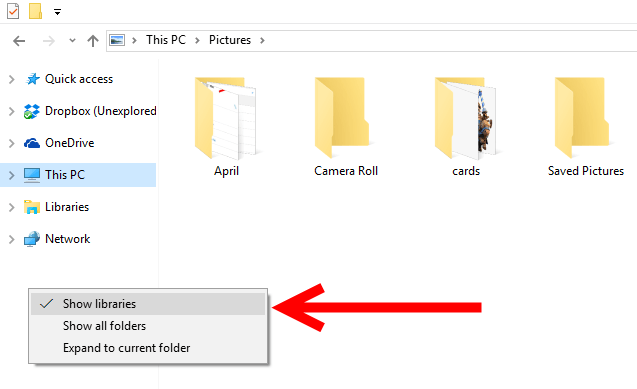
2. On the navigation pane, right-click an empty space and ensure that the Show Libraries option is selected.

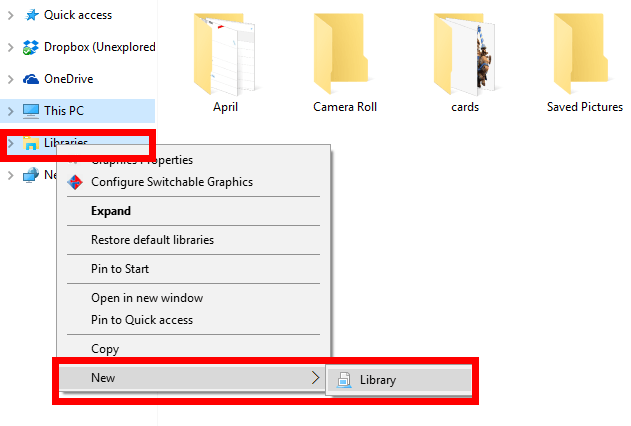
3. Right-click Libraries, click New and then select Library.

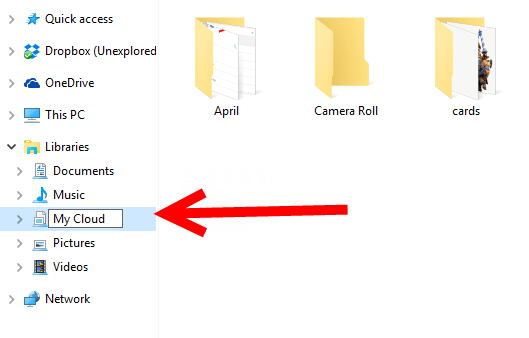
4. Change the default name of the newly created library to something descriptive, like My Cloud or My Cloud Folders.

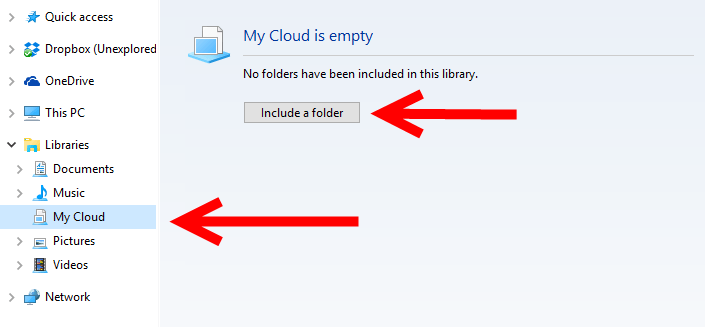
5. Click the folder you just created. In the right pane, click Include a Folder to add a folder to this library.

6. Navigate to the different local cloud folders (Dropbox, OneDrive, Google Drive or others) that you use and select each one to include in your newly created cloud library.
That’s it. You now have a unified view of all your cloud files by selecting that library in File Explorer. You can now use the search box to quickly find any file, regardless of where it’s stored.
Discover more ways to customize Windows 10 here.
Leave a Reply