Did you know that although Outlook 2010 doesn’t directly support creating a countdown calendar, you could create one to count down the days to your Thanksgiving holiday, Christmas, the New Year, or even your birthday? With a little bit of help from Excel 2010, you could easily set this up and in this Outlook 2010 tutorial, I’ll show you the step by step process on how to go about creating a Christmas countdown calendar. You can, of course, apply the same principles to create a countdown for any event of your choosing.
RELATED READING: You could read up how to create an Outlook calendar here if you’re new to Outlook.
How to Create a Christmas Countdown Calendar in Outlook 2010
1. Open up Excel 2010 (you can use other versions of Excel but the steps may vary slightly).
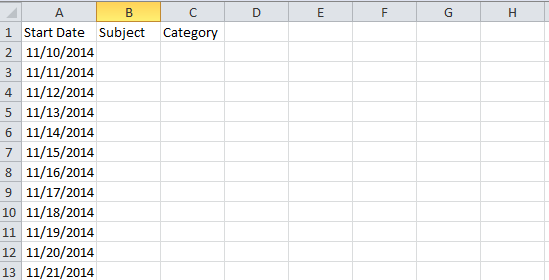
2. Create three columns in your worksheet. Name the first column Start Date, the second column Subject and the third one Category.
3. Enter today’s date in the first row of the Date column. You can press Ctrl+; to do this the short way.
4. Select the cell and drag down the fill handle until you have come down to the day before the date of your countdown. In this case, I will drag down until 24th Dec.
5. Scroll down to the last date and in the Subject field, enter a description like 1 days until Christmas. Now go to the previous date and enter 2 days until Christmas. This will create a series for you when you drag it up. Now click and select both cells and drag the fill handle up to complete the countdown series.
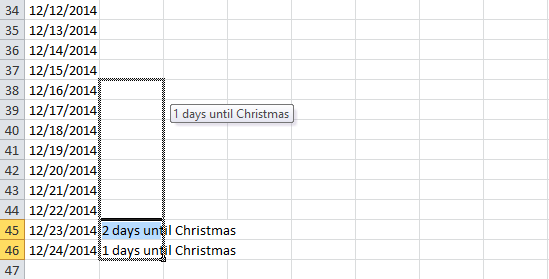
6. Now in the Category column, enter a name you like. I’m going to say Christmas Countdown. You don’t really need to create a category name, but this will come in handy when you want to delete it. I’m going to drag down the category name right to the end as well.
7. Now save the Excel sheet in the CSV format. I’m saving my sheet as Countdown to Christmas.csv . Close the Excel sheet. If you receive a message from Excel stating that it does not support multiple sheets, ignore it.
8. Now you can import this CSV file into Outlook 2010. Open Outlook.
9. Select the File tab, click Open and then click Import.
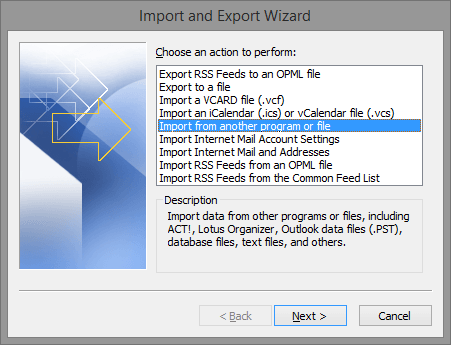
10. In the Import and Export wizard, select Import from another program or file and click Next.
11. In the Select file type to import from box, select Comma Separated Values (Windows) and click Next.
12. In the File to import screen, click Browse, navigate to the folder where you saved your Countdown to Christmas.csv file, select it and click OK. Then click Next.
13. In the Select Destination folder, select the Calendar folder where you want to import the file into and click Next.
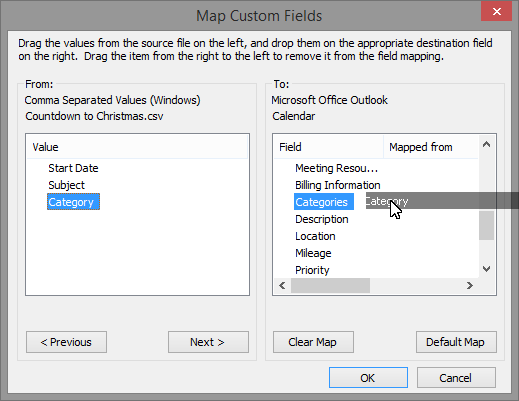
14. In the following actions will be performed screen, click Map Custom Fields. In the Map Custom Fields dialog, ensure that the mapping is appropriate. For instance, on the right column, you can see that the Start date in Excel is mapped to the Start date in Outlook. Similarly, the Subject is also mapped correctly. Scroll down to categories and you’ll notice that in Excel you created the title Category but Outlook shows it as Categories.
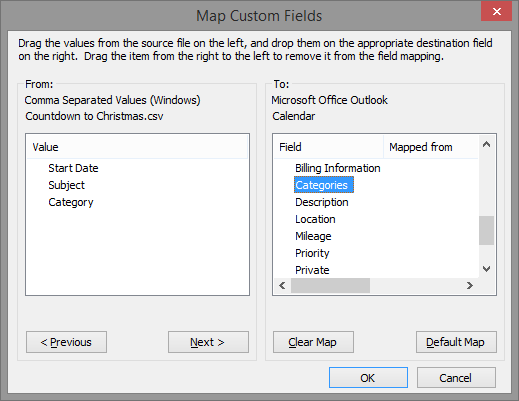
15. To map this item correctly, drag Category from the left column and place it over categories on the right column. Click OK.
16. Now click Finish to complete the import.
17. Now if you head over to your Calendar you will be able to view your countdown. If you want the countdown to display only to you and not others, you can open up the calendar view, and on the View tab, in the Current View group, click Change View and select List.
18. Select the date and on the Home tab, in the Tags group, click private to make it as private. To bulk privatize it, just select all the dates in the list, go to the View tab, and click view Settings. There you click Group by and if you see Recurrence, click Ok. Now just hit the private button and its done in a jiffy.
Downloadable: PDF Copy
How to Create a Christmas Calendar in Outlook 2010
I hope you make use of this Outlook 2010 tutorial to create a cool Christmas Countdown Calendar and enjoy doing it as well.
Leave a Reply