If you are reviewing a long Word document chances are, you need to break off your work and continue it later. Sometimes, you may even need to keep track of important information in a large document. Whatever the reason, you’ll need a tool to help you get to those key points as quickly as possible. The Bookmarks feature in Word is the right tool to help you in such situations. In this Word 2010 tutorial, you will learn how to use bookmarks in Word 2010.
How to Use Bookmarks in Word 2010
1. Open the Word document to which you want to add a bookmark.
2. Select the desired text you want to bookmark.

3. On the Insert tab, in the Links group, click Bookmark.

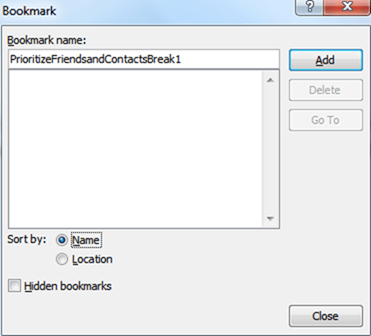
4. The Bookmark dialog box is displayed. In the Bookmark name text box, enter a name (No Spaces) for your bookmark and click Add.
5. Save the document (Ctrl+S) after adding the bookmark, else you won’t find the bookmark when you re-open the document.
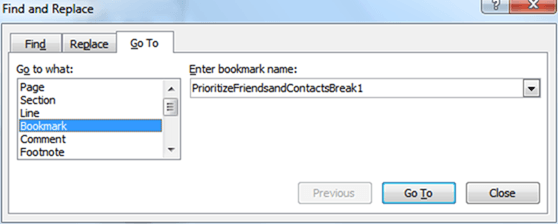
And you’ve just created your bookmark. The next time you want to resume working on your document from the bookmarked point, simply press Ctrl+G. This will display the Find and Replace dialog box.

On the Go To tab, select Bookmark and choose the bookmark you wish to go to from the Enter bookmark name drop-down list.
So the next time you need to mark text in your Word documents make use the bookmarking feature in Word to get your job done quickly and efficiently.
If you found this how to guide useful, be sure to visit our Archives section for more useful Word tutorials and tips.
Leave a Reply