It happens to the best of us. You accidentally delete some important files, folders or data on your PC and promptly empty your Trash. Suddenly you realize your mistake, and to your utter consternation, find that your backup has also failed. Thankfully, you don’t have to fret, because there are several great utilities today that can help you undelete files. Today, we take a look at a Mac data recovery tool called Disk Drill 3 that lets you recover lost data on MacOS and protect it so you never lose it again.
Disk Drill can scan, recover and protect data on virtually any storage device. This includes internal and external hard drives, cameras, iPods, USB flash drives, Kindles, and memory cards. It not only recovers files, but also prevent any accidental data loss in the future. Disk Drill also offers free tools to clean up your hard drive, find duplicates, create DMG backups, and monitor your disk’s health.
Scan Options in Disk Drill 3
Disk Drill offers 3 scanning options to help you find the data you’ve lost. They are Quick Scan, Undelete, and Deep Scan.
Quick Scan
Quick Scan lets you recover any file type with intact metadata. It works best when you have:
- Recently deleted files on volumes with FAT, ExFAT and NTFS file systems.
- Very recently deleted files on volumes with HFS+ file systems.
- Lost partitions on HFS+, FAT, ExFAT or NTFS volumes.
Undelete
The Undelete method lets you recover any file type, but only if you have activated the Guaranteed Recovery or Recovery Vault option on the volume in question, prior to data loss.
Deep Scan
Deep Scan recovery helps you recover deleted files on your Mac when all other methods fail. This method cannot recover the metadata, which means original file names will be lost, but will show up with a generic name like file123.doc.
So how do you recover deleted files on Mac? The process is pretty straightforward.
How to Undelete Files on Mac
1. Download and install the free Disk Drill Basic app. Then launch the application.
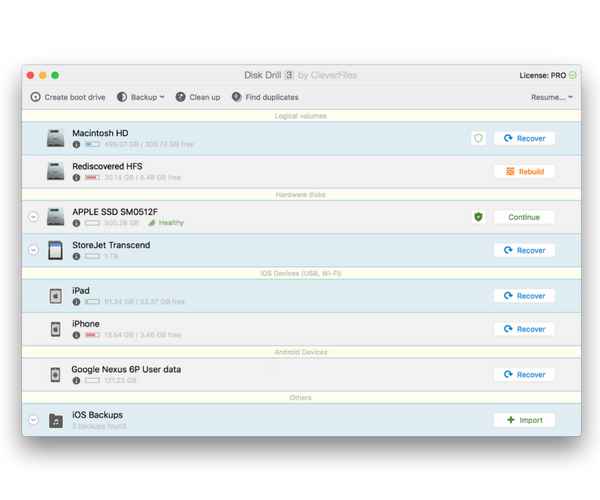
2. The Home screen of the app displays a list of the drives and devices available to be scanned. Select the disk or partition where you want to undelete files.

Note: If your device is not listed, at the bottom of the window, click the show them link to reveal any hidden items.
3. Click Recover next to the drive or device you want to scan. You can also right-click the drive and select Deep Scan or Quick Scan.
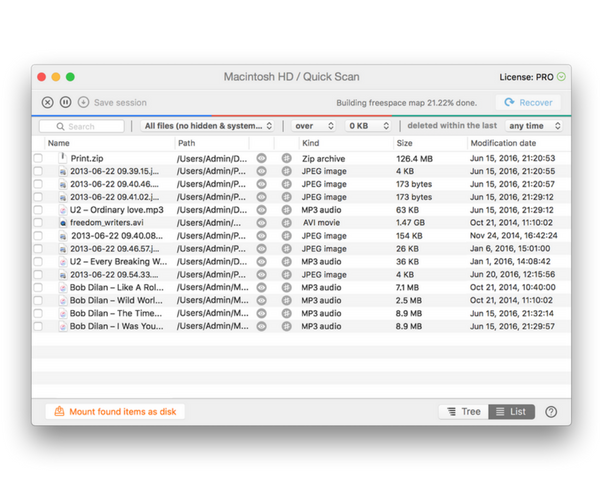
Note: Scanning time will depend on the size of the disk. If you want to pause the scan and come back to it later, you can save the scanning session and continue it later.
4. Once the scan is complete, the app will show you a list of the recovered files. You can preview the files to confirm that they are the ones you are looking for and that they are not damaged.

5. To recover the lost files, you’ll need to upgrade to the Pro version of Disk Drill.
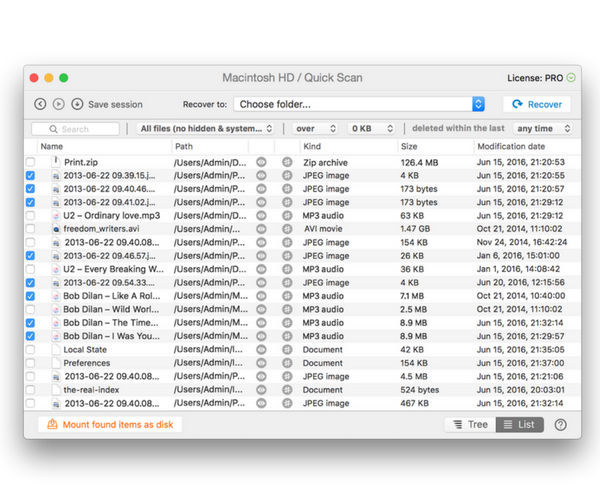
6. Once that’s done, select the files you want to undelete by checking the box next to the files.
7. Then, click the Recover button.

8. You can then save the files to a disk of your choice.
9. Open the files again in the new location to check if they transferred properly.
Protection Against Future Data Loss
Losing precious data on your computer or PC can happen anytime. Even if you don’t accidentally delete something, a hardware failure or a corrupt software can do a lot of damage. Instead of waiting for something to happen and then taking corrective action, it is best to have a good data recovery and protection software installed on your Mac. You’ll save time and money, not to mention avoid all that unwanted stress.
Disk Drill offers 3 unique features that help protect against future data loss. Recovery Vault, Guaranteed Recovery, and S.M.A.R.T. Monitoring. Once you activate your licensed copy of the app, enable these features to ensure faster and secure data recovery.

Recovery Vault
When you want to undelete files Mac HFS/HFS+ hard drives do not save the metadata, making it harder to recover them. With Recovery Vault enabled to protect a particular drive or partition, Disk Drill remembers the metadata for the file. Making it super easy to identify and recover the file with a quick scan. The good thing about this option is that it has a fairly small footprint and takes up very little storage space. The drawback here is that if the deleted files are overwritten by new data, the files are lost for good.
Guaranteed Recovery
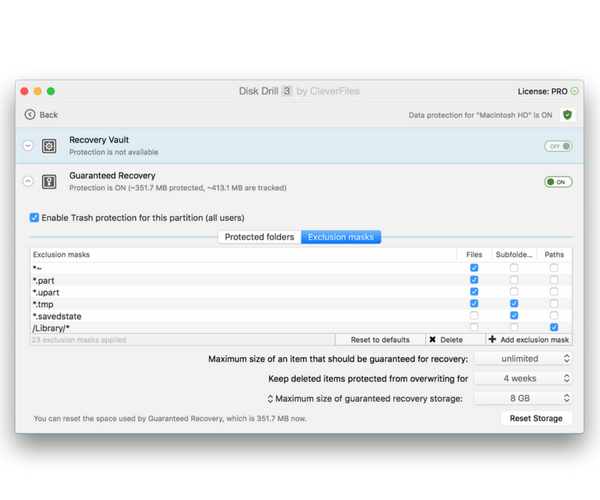
If you want to undelete trash Mac does not offer a straightforward option to do it. However, when you enable the Guaranteed Recovery option in Disk Drill, you allow the app to monitor the Trash folder and any other folder you specify. The app then makes a copy of the file you send to Trash or the specified folder. When you want to undelete files, an undelete recent function lets you quickly get it back.
Guaranteed Recovery is the absolute best way to guarantee data recovery. It does require extra hard drive space, but it guarantees complete data recovery, even if the original data file is overwritten.
S.M.A.R.T. Monitoring System
Disk Drill also offers a free data protection monitoring system called S.M.A.R.T. Once you turn on this feature, you can see the disk’s health status right on the Mac menu bar. Knowing the status of your disk health can help you to take steps in advance, such as to backup your data or repair your disk before you suffer any major data loss.
So that’s a quick overview of what you can do with Disk Drill. At $89, the Pro version of the app can be used on up to 3 Mac devices. It offers an ideal solution for home users who want to recover data quickly without having to go through a long winding process of scanning, previewing and recovery.
Visit the official website CleverFiles to know more about Disk Drill and how you can effortlessly undelete files you trashed.
Leave a Reply