If you’re a big fan of Android, chances are you’ve bought more than one Android phone in your lifetime. That’s great, but when you head over to install an app on Google Play, you’ll find all your old devices showing up for app installation. You can hide the old unused devices from showing up on Google play or remove them altogether. Whatever action you want to take, you’ll notice that its not immediately obvious. So here’s how to remove old Android devices in Google Play Install list.
How to Remove Old Android Devices from Google Play
1. Go to the Google Play website from your web browser. This is best done on a computer rather than your phone.
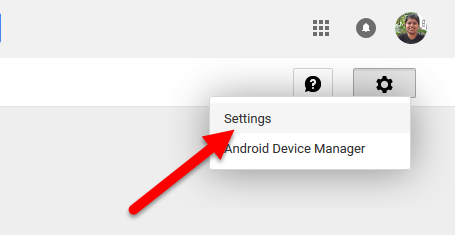
2. At the top right of the Google Play window, click the Gear icon and select Settings.

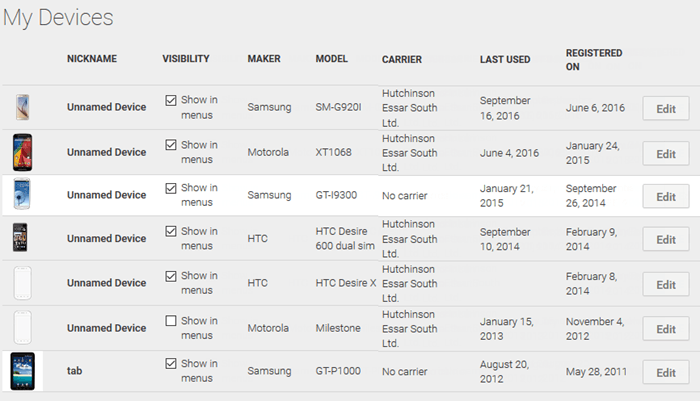
3. The Settings screen displays all your devices, along with a bunch of information such as make, model, carrier, last used, registration date and so on. You’ll also see an edit button beside each of your device names.

4. Uncheck the Show in menus check box to remove your Android devices from the Google Play Install list.
There is one more thing you can do here and that is update the name or nickname of your Android. To do that:
1. Click the Edit button corresponding to the Android device.
2. The Unnamed field will become activated. Enter a name of your choice.
Once you’ve made the changes, give Google Play a few minutes to reflect the changes in the installation menu.
If you found this Android tip useful, check out our archives section for more Android how to tutorials and updates.
Leave a Reply