If you are a blogger and are looking for a way to engage actively with your audience, by connecting to them at a deeper professional level, using a web app of course, then this post is for you. With most professional communication being done using email, it is essential that you provide your email recipients with more options to learn about who you are, what you or your company stand for. For instance, providing a sneak peek into the latest happenings on your blog or on your social media status is more likely to spark your reader’s interest in you and your blog. This will help build a strong social network and give wider visibility to your business. And the best thing is that you don’t really have to do something dramatic to establish your presence. Just create signatures with social media buttons using a free web browser add-on called WiseStamp. This add-on works only on selected email clients and browsers. Since I’m a big fan of RockMelt, I gave this one a try on the new social browser, and it worked beautifully.
Top Features of WiseStamp
1. Include social media profiles in your Email signature.
2. Customize your email signature with images, designs and more.
3. Add updated content in your email communication.
4. Add multiple signatures.
5. Works with Gmail, Google App’s, Yahoo Mail, Hotmail, AOL and more.
6. Available for Firefox, Chrome, Rockmelt, and Safari.
How to Create a Signature Using WiseStamp
1. Download and install WiseStamp.
2. The WiseStamp dialog box is displayed. From the Personal drop-down list, select an email category.
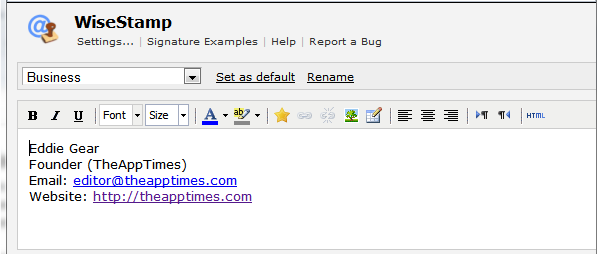
3. Enter the signature details.
4. Add email apps to your email. Choose an app in the gallery and click the add button.
5. If required, select the Social Icons tab and add a link to your social media profile.
6. If required, select the IM Icons tab and add your username in the Instant Messaging services you use.
7. If necessary, select the Designs tab, and add a border and color background.
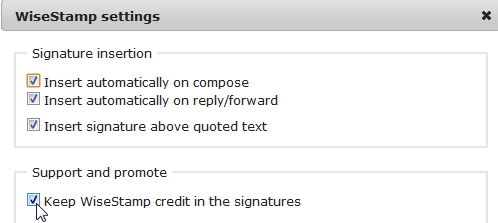
8. In the WiseStamp dialog box, click Settings and in the WiseStamp settings dialog box, uncheck Keep WiseStamp credit in the signatures.
9. Click the Preview button at the bottom of the dialog box, check and make modifications as required and click OK.
10. Click Apply and then click OK.
How to Create Signatures with Social Media Buttons Using WiseStamp
1. Open Gmail and compose the email.
2. On the RockMelt App Edge, click the app icon and insert the signature.
Now that you have learned how to create a social media optimized Gmail signature, you are all set to impress your clients and email recipients with your fabulous new email signature.
You can check out some of the other cool apps, such as Quotabl.es, which allows you to browse and share quotes, NudgeMail, which is an email reminder service, and Giftalogs, that allow you to save and share your gift ideas.


I used Wisestamp earlier, but now since Gmail also started offering HTML signatures some time back, I switched to that.
Still I’ll say Wisestamp is a nice and easy way to create signatures. And you have explained how to go with it nicely 🙂
Rightly said Anshul. It is more convenient to have the signature feature integrated into the email client, but it’s also pretty cool to use the App Edge in RockMelt to insert the signature. And what works well for one situation may not be so effective elsewhere, These different apps gives us the ability to play around with different options and that’s always fun and exciting!!