Sometimes, you may be required to send a letter to multiple recipients. In such a situation, it will be time consuming if you have to address each letter individually. Word 2010 allows you to reduce the time and effort involved in typing or copy-pasting each individual address by using a feature known as mail merge. In this Office 2010 tutorial, you will learn how to perform a mail merge for a letter.
How to Perform a Mail Merge in Word 2010
To start off with the process of mail merge you first need to have or create two files.
1. The main file that contains the data required to be present in each letter or document.
2. The source file that contains information specific to each recipient, such as name, email address, and so on. The source file can be an Excel file, a Word document, an Outlook file or other files.
How to Create the Main Document (Letter)
1. Open Word 2010 and select the Mailings tab.
2. In the Start Mail Merge group, click Start Mail Merge and select Letter.
3. Add the necessary details in the letter such as the business title, date, body text, and signature.
4. Save the document.
How to Connect to the Data Source (Outlook)
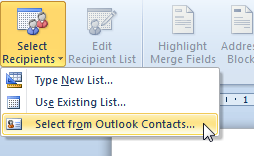
1. On the Mailings tab, in the Start Mail Merge group, click Select Recipients and from the drop-down list choose Select from Outlook Contacts.
2. If necessary, in the Choose Profile dialog box, select a profile name or create a new profile name and click OK.
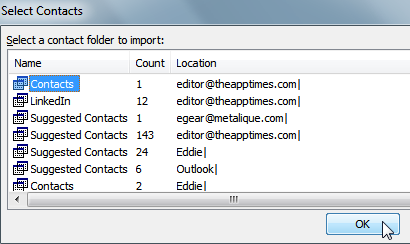
3. The Select Contacts dialog box is displayed. Select a contact folder and click OK.
4. The Mail Merge Recipients dialog box is displayed. Check the check box of the recipients you want to include in the merge. You can sort, filter, find recipients and perform additional actions to select the recipients to add to the mail merge list. Once you have selected the required number of recipients, click OK.
How to Add Mail Merge Fields
1. On the Mailings tab, in the Write & Insert Fields group, click Insert Merge Field.
2. From the drop-down list, select a merge field. As you enter a field, Word inserts
them in your document within codes like this <<Title>>.
Note: If you want to add multiple placeholders such as a title, first and last name, insert placeholders for <<Title>>, <<First Name>> and <<Last Name>> next to each other with space between the fields.
3. Insert a greeting line.
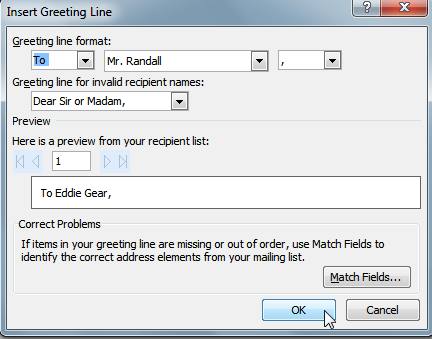
a. On the Mailings tab, in the Write & Insert Fields group, click Greeting Line.
b. In the Insert Greeting Line dialog box, select the greeting line format and click OK.
How to Preview and Complete the Merge
1. On the Mailings tab, in the Preview Results group, click Preview Results. Click the Next and Previous Record buttons to preview all the results.
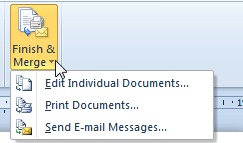
2. On the Mailings tab, in the Finish group, click Finish & Merge.
3. From the drop-down list, select an option.
Select Edit Individual Documents to save the merged results for future use.
Select Print Documents to print the merge results.
Select Send E-mail Messages to email the results.
Mail merge may appear to be somewhat intimidating to use at first, but once you are familiar with the commands, you can use it to accomplish your repetitive tasks with ease. Depending on your work requirements, you can customize your mail merge settings. Try out various combinations and settle on one that works best for you. And if you have any questions on this process, connect to us, and we will help resolve your questions.


hey ed,
this is amazing info for me, i previously used a macro for doing this activity. i will use office 10 now in the simplest way.
thanks dude.
Windows Live Mail and Word 2010 Mail Merge
________________________________________
I would like to use Word 2010 Mail Merge to compose and send email messages. My email client is Windows Live Mail. I do not have Outlook. I do not need to access my WLM Contacts list. The email addresses I want to send messages to are in Excel that I am using as the Mail Merge data source. I have gone through all of the steps of a Mail Merge, including writing the email message, inserting data fields into it, and selecting recipients. The last step is to finish, merge, and send messages. I click on that step and nothing happens – no error message appears but no messages are sent. Any advice? It’s possible this can’t be done, but I am hoping it can.
Regards
Danie
Hi Danie,
Thanks for your comments at theapptimes.com. You will be able to do a mail merge in a plain text format but not a HTML format. Ensure that you add the email contacts that are in your Excel sheet in Your Windows Live Contact list and when you hit the Finish and Merge button, in the Merge to E-mail dialog box, select Plain text. This process doesn’t seem to work in HTML I’m afraid.